Auto Body Repair

Auto body repair products aid in the repair and renovation of vehicle exteriors to remove dents, fill gouges, and restore surfaces to their original condition. Sealants and fillers help repair and reconstruct exterior auto body parts. Tools ease removal, assembly, and reconstruction of auto body com .....Read More

Frequently Asked Questions

What are the best auto body repair products for fixing dents?

Please tell me what you would like me to answer.

How do I choose the right sealant for my car's exterior?

Choosing the right sealant for your car's exterior depends on several factors, including your car's paint condition, desired durability, application ease, and budget. Sealants offer superior protection and longevity compared to traditional waxes, typically lasting for months rather than weeks. For newer cars with well-maintained paint, a synthetic polymer sealant is an excellent choice. These sealants create a durable, clear barrier that repels water, dirt, and UV rays, providing a high-gloss finish. They are relatively easy to apply and can last up to six months or more. If your car's paint has minor imperfections, a sealant with light abrasive or filler properties might be beneficial. These products can subtly fill in swirl marks and minor scratches, enhancing the paint's appearance while offering protection. However, for significant damage, professional paint correction is recommended before sealant application. Ceramic coatings, a more advanced type of sealant, offer the highest level of durability and protection, often lasting for years. They create a semi-permanent bond with the paint, offering exceptional resistance to contaminants, chemicals, and UV damage. While they provide superior performance, ceramic coatings are generally more expensive and require more meticulous application, often best left to professionals. Consider your local climate as well. If you live in an area with harsh winters or intense sun, a more robust sealant like a ceramic coating or a long-lasting synthetic polymer sealant would be advantageous. Ultimately, research different brands, read reviews, and consider testing a small area to ensure compatibility and desired results.

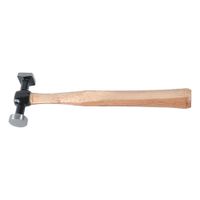
What tools are essential for auto body repair?

Essential tools for auto body repair include a wide range of specialized equipment. For body work, you'll need hammers (body hammers, dollies, mallets) for shaping and smoothing dents, and various files and sanders (DA sander, block sander) for surface preparation. Welding equipment, such as MIG welders, is crucial for joining metal panels. For painting, a spray gun, air compressor, and paint booth are necessary for a professional finish. Diagnostic tools, like scan tools, are important for identifying underlying issues. Safety gear, including gloves, respirators, and eye protection, is paramount. Additionally, a lift or jack stands, wrenches, sockets, and screwdrivers are standard tools for general disassembly and reassembly. Specialized tools for frame straightening, measuring systems, and pulling equipment may also be needed depending on the extent of the damage.

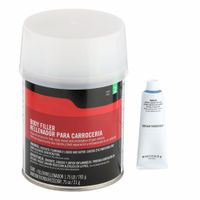
How do I use body fillers to repair gouges in my car?

Body fillers are commonly used to repair gouges and other minor damage on car bodies. To use them effectively, you'll first need to clean the damaged area thoroughly, removing any dirt, grease, or loose paint. Sand the area around the gouge with coarse-grit sandpaper to create a good surface for the filler to adhere to. Next, mix the body filler according to the manufacturer's instructions, ensuring a consistent color and texture. Apply a thin layer of the mixed filler to the gouge using a plastic spreader, pressing it firmly into the damaged area to fill any voids. Allow it to dry completely, which usually takes about 20-30 minutes, depending on the product and temperature. Once dry, sand the filler with progressively finer-grit sandpaper until it's smooth and level with the surrounding bodywork. You may need to apply a second, thinner coat of filler if the gouge is deep or if you need to refine the shape. After the filler is shaped and smooth, clean the area again, and then prime and paint it to match your car's color.

What is the best way to remove and replace auto body parts?

To remove and replace auto body parts, the best approach involves several key steps to ensure a proper and safe repair. First, gather the necessary tools, which typically include wrenches, sockets, screwdrivers, trim removal tools, and possibly specialized body panel tools. Disconnect the vehicle's battery to prevent electrical shorts. Next, carefully identify and remove all fasteners, clips, and bolts securing the damaged panel. Pay close attention to hidden fasteners, such as those behind trim pieces or within wheel wells. For panels like bumpers or fenders, there might be connections to wiring harnesses for lights or sensors, which need to be gently unplugged. Use trim removal tools to avoid scratching or damaging surrounding paint and components. Once all fasteners are removed, carefully detach the damaged panel. It's often helpful to have an extra pair of hands, especially for larger panels. Before installing the new part, clean the mating surfaces on the vehicle to ensure a flush fit. Finally, align the new auto body part and loosely reattach all fasteners. Once all fasteners are in place, tighten them securely, working in a pattern that ensures even pressure. Reconnect any electrical components, such as lights or sensors, and then reconnect the vehicle's battery. After installation, inspect the alignment and gaps to ensure a professional finish.

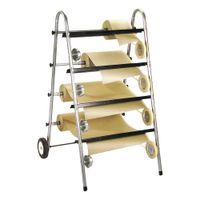
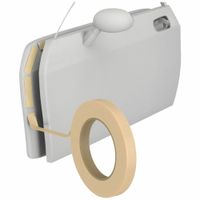
How do I properly mask a vehicle before painting?

Masking a vehicle before painting is a crucial step to ensure a professional and clean finish. It involves covering all areas that should not be painted, protecting them from overspray and accidental drips. The process typically begins with cleaning the vehicle thoroughly to remove any dirt, grease, or wax that could interfere with adhesion. Once clean and dry, specialized masking tape and paper or plastic sheeting are used. Different widths of tape are available for various contours and edges. Fine line tape is often used for crisp lines, while wider tapes secure larger areas of masking paper or plastic. Key areas to mask include windows, mirrors, chrome trim, tires, wheels, and any interior components that might be exposed. It's also important to cover the engine bay, door jambs, and trunk if they are not being painted. Ensure all edges are tightly sealed to prevent paint from seeping underneath. Overlap masking materials to create a secure barrier. Properly masking a vehicle not only protects unpainted areas but also streamlines the painting process, saving time and effort on post-painting cleanup.

What types of tapes are best for reducing squeaking in vehicles?

When addressing squeaking in vehicles, various types of tapes can be effective, depending on the source and nature of the noise. Felt tapes are excellent for cushioning and reducing friction between surfaces, commonly used on interior trim pieces, dashboards, and door panels where plastic or metal components might rub. UHMW (Ultra High Molecular Weight) polyethylene tape is another strong contender due to its low-friction properties and high abrasion resistance, making it suitable for areas with repetitive movement like window channels or seat mechanisms. For more structural or heavy-duty applications, acrylic foam tapes (VHB - Very High Bond) can provide both sound dampening and strong adhesion, often used to secure emblems or trim that might vibrate against the vehicle body. Fabric or cloth tapes, such as automotive wiring harness tape, can also be effective for wrapping wires or components to prevent rattling and provide a snug fit. Lastly, for areas exposed to moisture or extreme temperatures, specialized waterproof or high-temperature resistant tapes should be considered. The best choice ultimately depends on identifying the exact location and cause of the squeak.

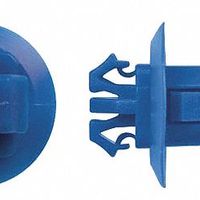
How do I install body clips to keep trim intact?

To install body clips to keep trim intact, you generally need to align the clips with the corresponding holes or slots on both the trim piece and the vehicle's body panel. Many body clips are designed to snap into place. You might hear a "click" when they are properly seated. For some clips, especially those with a push-pin or screw design, you may need a specialized trim removal tool or a screwdriver to either push the center pin in or twist the screw to expand the clip and secure the trim. Always ensure the trim is properly aligned before applying pressure to avoid damaging the clips or the trim itself. If the clips are old or broken, they should be replaced to ensure a secure fit and prevent the trim from rattling or falling off.

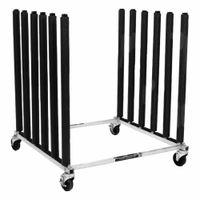
What equipment is needed to support auto body parts during repair?

When repairing auto body parts, various equipment is crucial for proper support and alignment. This includes specialized stands, often adjustable, designed to securely hold panels, doors, hoods, and bumpers in place during tasks like sanding, painting, or welding. These stands prevent movement and ensure consistent results. Additionally, body jigs and alignment benches are essential for structural repairs. These systems provide a stable platform and precise measurement points to correct frame damage and ensure the vehicle's structural integrity. Clamps and bracing tools are also used to hold components tightly together during welding or bonding, preventing distortion. For more delicate work, specialized clamps and holding tools are used to secure smaller components or trim pieces without causing damage. Finally, protective covers and blankets are often used to shield adjacent areas from overspray or sparks during the repair process, further supporting the quality and safety of the work.

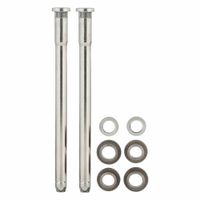
How do hinge and bushing kits work for replacing door parts?

Hinge and bushing kits are essential for repairing worn or damaged vehicle door hinges. Over time, repeated opening and closing of doors can cause the original hinge pins and bushings to wear out, leading to issues like sagging doors, difficulty closing, and rattling noises. A typical hinge and bushing kit includes new pins, bushings, and sometimes additional components like clips or washers. The pins are the central rods that pass through the hinge components, allowing the door to pivot. The bushings are small, cylindrical sleeves that fit inside the hinge knuckles, providing a smooth, low-friction surface for the pins to rotate within. They also help to fill the gap between the pin and the hinge, reducing play and improving stability. The repair process generally involves removing the old, worn pins and bushings. This often requires specialized tools to press out the old components. Once removed, the new bushings are inserted into the hinge knuckles, followed by the new pins. The precise fit of the new components eliminates the excessive movement that caused the original problems. This restores the door's alignment, allowing it to open and close smoothly, and eliminating the sagging or rattling. The simplicity of these kits makes them a cost-effective solution for extending the life of vehicle doors without needing to replace the entire hinge assembly.