Call +(254) 703 030 000 / 751 483 999 / 721 704 777
Tire Repair
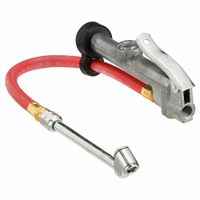
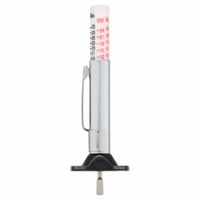
Tire inflators and deflators equipment fill or release air from tires to achieve the correct pressure levels. Tire inflator gauges fill tires and check tire pressure in one unit. Tire chucks connect to the end of an air compressor tool that inflates, deflates, or checks the air pressure of a tire. T .....Read More


Frequently Asked Questions
What is the best tire inflator for home use?
The best tire inflator for home use is the Viair 88P Portable Air Compressor. This inflator is highly regarded for its balance of power, portability, and ease of use, making it ideal for home use. It operates on a 12V power source, which can be easily connected to a car battery, and is capable of inflating tires up to 33 inches in diameter.
The Viair 88P features a maximum working pressure of 120 PSI, ensuring it can handle a wide range of tire sizes and types, from cars to light trucks. It comes with a 10-foot power cord and a 16-foot air hose, providing ample reach to inflate all tires on a vehicle without needing to move the compressor.
The inflator is equipped with a built-in LED work light, which is particularly useful for nighttime or low-light situations. It also includes a pressure gauge mounted on top, allowing for easy monitoring of tire pressure during inflation.
Durability is another strong point of the Viair 88P, as it is constructed with high-quality materials designed to withstand regular use. Its compact size and lightweight design make it easy to store and transport, adding to its convenience for home users.
Overall, the Viair 88P Portable Air Compressor offers a combination of reliability, efficiency, and user-friendly features, making it a top choice for those seeking a dependable tire inflator for home use.
How do I use a tire inflator with a gauge?
To use a tire inflator with a gauge, follow these steps:
1. **Preparation**: Ensure your vehicle is parked on a flat surface and the parking brake is engaged. Check the recommended tire pressure for your vehicle, usually found on a sticker inside the driver’s door or in the owner’s manual.
2. **Inspect the Inflator**: Ensure the inflator is in good working condition. If it's electric, connect it to a power source, such as a car's 12V outlet or a wall socket, depending on the model.
3. **Remove Valve Cap**: Unscrew the valve cap from the tire's valve stem and keep it in a safe place.
4. **Attach the Inflator**: Connect the inflator's nozzle to the tire's valve stem. Ensure a secure fit to prevent air leakage. You may hear a slight hiss as you attach it, which is normal.
5. **Check Initial Pressure**: Read the current tire pressure on the gauge. This will help you determine how much air is needed.
6. **Inflate the Tire**: Turn on the inflator. Monitor the gauge as the tire inflates. If the inflator has an automatic shut-off feature, it will stop at the set pressure. If not, manually stop the inflator when the desired pressure is reached.
7. **Recheck Pressure**: After inflating, detach the nozzle and quickly check the pressure again to ensure accuracy. If overinflated, release some air by pressing the valve stem pin.
8. **Secure the Valve Cap**: Once the correct pressure is achieved, reattach the valve cap securely.
9. **Repeat for Other Tires**: Follow the same process for all tires, including the spare if necessary.
10. **Store the Inflator**: Turn off and disconnect the inflator, then store it properly for future use.
What is the correct tire pressure for my vehicle?
The correct tire pressure for your vehicle is typically specified by the vehicle manufacturer and can be found in several places: the owner’s manual, a sticker on the driver’s side door jamb, or inside the fuel cap. This pressure is measured in pounds per square inch (PSI) and is determined based on the vehicle's weight, size, and intended use.
For most passenger cars, the recommended tire pressure ranges from 30 to 35 PSI. However, this can vary significantly for different vehicles, such as trucks, SUVs, or performance cars, which may require higher or lower pressures. It's important to note that the pressure indicated on the tire sidewall is the maximum pressure the tire can handle, not the recommended pressure for your vehicle.
Maintaining the correct tire pressure is crucial for several reasons: it ensures optimal contact with the road, which improves handling and safety; it maximizes fuel efficiency by reducing rolling resistance; and it extends the life of the tires by promoting even wear. Under-inflated tires can lead to poor handling, increased fuel consumption, and premature tire wear, while over-inflated tires can result in a harsh ride and increased risk of a blowout.
To ensure your tires are at the correct pressure, check them at least once a month and before long trips, using a reliable tire pressure gauge. Always check the pressure when the tires are cold, as driving heats them up and can give a false reading. Adjust the pressure as needed to match the manufacturer's recommendation. Regularly maintaining the correct tire pressure is a simple yet effective way to enhance your vehicle's performance and safety.
How do I know if my tire valve needs maintenance?
To determine if your tire valve needs maintenance, look for the following signs:
1. **Air Leakage**: If you notice your tire losing air pressure more quickly than usual, it could indicate a faulty valve. Use a pressure gauge to check the tire pressure regularly. If it consistently drops, inspect the valve.
2. **Physical Damage**: Examine the valve stem for any visible cracks, cuts, or damage. A damaged valve stem can lead to air leaks and should be replaced.
3. **Valve Cap Condition**: Ensure the valve cap is present and in good condition. The cap protects the valve from dirt and moisture, which can cause corrosion and leaks. If the cap is missing or damaged, replace it.
4. **Hissing Sound**: Listen for a hissing sound near the valve, which indicates air escaping. This can be due to a loose or damaged valve core.
5. **Bubble Test**: Apply soapy water to the valve area. If bubbles form, it indicates a leak, suggesting the valve needs maintenance or replacement.
6. **Age and Wear**: Over time, valves can deteriorate due to exposure to the elements. If your tires or valves are several years old, consider having them inspected by a professional.
7. **Tire Pressure Monitoring System (TPMS) Warning**: If your vehicle is equipped with TPMS and the warning light is on, it could be due to a valve issue. Check the valve and tire pressure.
8. **Professional Inspection**: During regular tire maintenance or rotation, ask a professional to inspect the valves. They can identify issues that may not be visible to the untrained eye.
Regularly checking these aspects can help ensure your tire valves are in good condition, preventing potential tire issues and maintaining vehicle safety.
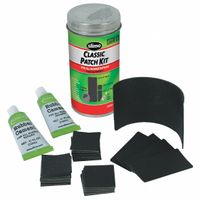
How do I repair a minor tire puncture?
1. **Locate the Puncture**: Inflate the tire and listen for a hissing sound or use soapy water to find bubbles indicating the puncture.
2. **Remove the Tire**: Loosen the lug nuts, lift the vehicle with a jack, and remove the tire.
3. **Prepare the Area**: Mark the puncture spot. Use a rasp tool to clean and roughen the area around the hole.
4. **Insert the Plug**: Thread a rubber plug through the eye of the insertion tool. Push the tool into the puncture until only a small part of the plug is visible. Pull the tool out, leaving the plug in place.
5. **Trim the Plug**: Use a knife or scissors to cut the excess plug material flush with the tire surface.
6. **Reinstall the Tire**: Place the tire back on the wheel hub, hand-tighten the lug nuts, lower the vehicle, and fully tighten the nuts in a crisscross pattern.
7. **Inflate the Tire**: Use an air compressor to inflate the tire to the recommended pressure.
8. **Check for Leaks**: Apply soapy water to the repaired area to ensure no air bubbles form, indicating a successful repair.
9. **Test Drive**: Drive a short distance to ensure the repair holds and the tire feels stable.
10. **Monitor the Repair**: Regularly check the tire pressure and inspect the repair for any signs of failure.
How often should I check my tire pressure?
You should check your tire pressure at least once a month. Regular checks are crucial because tires naturally lose air over time, approximately 1-2 psi per month. Additionally, temperature changes can affect tire pressure; for every 10°F change in temperature, tire pressure can change by about 1 psi. Therefore, it's particularly important to check tire pressure when the seasons change.
Before long trips, it's advisable to check your tire pressure to ensure optimal performance and safety. Under-inflated tires can lead to poor fuel efficiency, increased tire wear, and a higher risk of blowouts. Over-inflated tires can reduce traction and cause uneven wear.
Always check tire pressure when the tires are cold, as driving heats them up and can give a false reading. Use a reliable tire pressure gauge and compare the readings to the recommended pressure levels found in your vehicle's owner manual or on the sticker inside the driver's door.
Regular tire pressure checks contribute to better handling, fuel efficiency, and tire longevity, ensuring a safer driving experience.
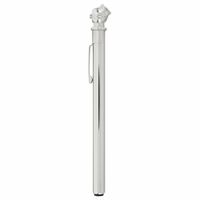
What are the signs that my tire tread is too low?
1. **Tread Wear Indicators**: Modern tires have built-in tread wear indicators, which are small bars of rubber running perpendicular to the tread. If these bars become flush with the tread, it's time to replace the tire.
2. **Penny Test**: Insert a penny into the tread groove with Lincoln's head upside down. If you can see the top of Lincoln's head, the tread is too low and the tire needs replacement.
3. **Uneven Wear**: Check for uneven tread wear patterns, such as bald spots or more wear on one side. This can indicate alignment issues or improper inflation, but also means the tread is wearing down.
4. **Reduced Traction**: Noticeable loss of traction, especially in wet conditions, can be a sign of low tread. This can lead to hydroplaning and reduced braking efficiency.
5. **Vibration**: Excessive vibration while driving can indicate uneven tread wear or low tread depth, affecting the tire's ability to grip the road.
6. **Visible Damage**: Look for visible signs of damage like cuts, cracks, or bulges in the tire, which can accompany low tread and compromise safety.
7. **Tread Depth Measurement**: Use a tread depth gauge to measure the tread. If it's below 2/32 of an inch, the tire is considered legally worn out in many regions.
8. **Increased Stopping Distance**: If you notice your vehicle takes longer to stop, it could be due to insufficient tread depth affecting braking performance.
9. **Noise**: Unusual noises, such as squealing or thumping, can indicate uneven or low tread, affecting the tire's contact with the road.
10. **Age of Tire**: Even if the tread appears adequate, tires older than six years may have deteriorated rubber, affecting performance and safety.