Call +(254) 703 030 000 / 751 483 999 / 721 704 777
Vehicle Cleaning Applicators & Equipment
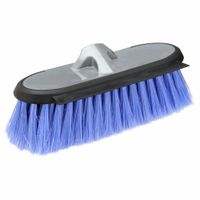
Vehicle cleaning applicators and equipment maintain a vehicle's interior or exterior surfaces, wash away impacted dirt, eliminate superficial scratches, polish body paint, and remove debris. Vehicle hand-cleaning brushes apply soap and wash surfaces, preventing rust from occurring and maintaining a .....Read More
Frequently Asked Questions
What are the best tools for cleaning a car's interior and exterior?
For cleaning a car's interior, the best tools include:
1. **Vacuum Cleaner**: A portable vacuum with various attachments is essential for removing dirt and debris from seats, carpets, and crevices.
2. **Microfiber Cloths**: These are ideal for dusting and wiping surfaces without scratching.
3. **Brushes**: Use soft-bristle brushes for delicate surfaces and stiffer brushes for carpets and upholstery.
4. **Steam Cleaner**: Effective for deep cleaning upholstery and carpets, killing bacteria and removing stains.
5. **Interior Cleaner**: A good all-purpose cleaner for dashboards, consoles, and other surfaces.
6. **Leather Conditioner**: Essential for maintaining and protecting leather seats.
7. **Glass Cleaner**: Ensures streak-free windows and mirrors.
For the exterior, the best tools include:
1. **Pressure Washer**: Efficient for removing dirt and grime from the car's surface.
2. **Car Wash Mitts**: Made of microfiber or lambswool, these are gentle on paint and effective in cleaning.
3. **Buckets with Grit Guards**: Prevents dirt from being reintroduced to the mitt.
4. **Car Shampoo**: A pH-balanced shampoo is crucial to avoid stripping wax or damaging paint.
5. **Clay Bar**: Removes embedded contaminants from the paint surface.
6. **Polisher/Buffer**: For applying polish and wax, ensuring a smooth and shiny finish.
7. **Wax or Sealant**: Protects the paint and enhances shine.
8. **Wheel Cleaner and Brushes**: Specifically designed for cleaning wheels and tires.
9. **Drying Towels**: Large, absorbent microfiber towels for drying the car without leaving streaks.
These tools, when used correctly, can help maintain a car's appearance and prolong its lifespan.
How do I remove scratches from my car's paint?
To remove scratches from your car's paint, follow these steps:
1. **Assess the Scratch**: Determine the depth of the scratch. If it catches your fingernail, it's likely deeper and may require professional repair.
2. **Clean the Area**: Wash the scratched area with car soap and water to remove dirt and debris. Dry it thoroughly with a microfiber cloth.
3. **Sand the Scratch**: For deeper scratches, use fine-grit sandpaper (2000-3000 grit). Wet the sandpaper and gently sand the scratch in a circular motion until it becomes less visible. Be cautious not to sand too much.
4. **Apply Rubbing Compound**: Use a microfiber cloth to apply a small amount of rubbing compound to the scratched area. Rub it in a circular motion with moderate pressure. This will help smooth out the surface and blend the scratch with the surrounding paint.
5. **Polish the Area**: After the rubbing compound, apply a car polish to restore the shine. Use a clean microfiber cloth and polish in a circular motion.
6. **Wax the Car**: Apply a quality car wax to protect the paint and enhance the shine. Use a clean applicator pad, apply the wax in a circular motion, let it dry, and then buff it off with a microfiber cloth.
7. **Touch-Up Paint (if needed)**: For deeper scratches that expose the metal, use touch-up paint that matches your car's color. Apply it carefully with a fine brush, let it dry, and then lightly sand and polish the area.
8. **Final Inspection**: Check the area in different lighting to ensure the scratch is less visible and the finish is smooth.
Regular maintenance and protective measures, like using a car cover, can help prevent future scratches.
What is the best way to wash a car to prevent rust?
To prevent rust while washing a car, follow these steps:
1. **Choose the Right Location**: Wash your car in a shaded area to prevent water spots and avoid direct sunlight, which can cause soap to dry too quickly.
2. **Use Quality Products**: Select a pH-balanced car wash soap specifically designed for automotive use. Avoid household detergents as they can strip protective wax and damage paint.
3. **Pre-Rinse**: Start with a thorough rinse using a hose or pressure washer to remove loose dirt and debris. This reduces the risk of scratching the paint during washing.
4. **Two-Bucket Method**: Use one bucket for soapy water and another for rinsing your wash mitt. This minimizes the transfer of dirt back onto the car.
5. **Wash Top to Bottom**: Begin washing from the top of the car and work your way down. This prevents dirt from being dragged over clean areas.
6. **Focus on Problem Areas**: Pay special attention to areas prone to rust, such as wheel wells, undercarriage, and door sills. Use a soft brush for these spots.
7. **Rinse Thoroughly**: After washing, rinse the car thoroughly to remove all soap residue, which can attract dirt and moisture.
8. **Dry Completely**: Use a microfiber towel or chamois to dry the car completely. Pay extra attention to seams and crevices where water can accumulate.
9. **Apply Wax or Sealant**: After drying, apply a high-quality wax or paint sealant to create a protective barrier against moisture and contaminants.
10. **Regular Maintenance**: Wash your car regularly, especially after exposure to salt, mud, or other corrosive materials. Regular maintenance helps prevent rust formation.
By following these steps, you can effectively wash your car while minimizing the risk of rust.
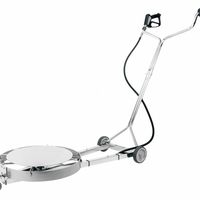
How do I properly use a car wash stall equipment?
To properly use a car wash stall, follow these steps:
1. **Preparation**: Park your car in the center of the stall. Ensure windows are closed and antennae are retracted. Remove any detachable accessories.
2. **Payment**: Insert coins, tokens, or use a card to activate the machine. Familiarize yourself with the time limit and options available.
3. **Pre-Soak**: Select the pre-soak option. Use the spray wand to apply the pre-soak solution evenly across the car, focusing on areas with heavy dirt or bugs.
4. **High-Pressure Soap**: Switch to the high-pressure soap setting. Hold the wand at a 45-degree angle, about 1-2 feet from the surface. Start from the top and work your way down, ensuring all areas are covered.
5. **Scrubbing**: Use the provided brush for stubborn dirt. Dip it in the soap solution and scrub areas like wheels, bumpers, and lower panels. Rinse the brush before returning it.
6. **Rinse**: Change to the high-pressure rinse setting. Rinse the car thoroughly, starting from the top. Ensure all soap is removed to prevent streaks.
7. **Wax (Optional)**: If available, select the wax option. Apply a thin, even layer over the entire car to protect the paint and enhance shine.
8. **Final Rinse**: Use the spot-free rinse setting if available. This helps prevent water spots by using deionized water.
9. **Drying**: Quickly dry the car with microfiber towels to avoid water spots. Focus on windows, mirrors, and crevices.
10. **Clean Up**: Return equipment to its place. Dispose of any trash and ensure the stall is clean for the next user.
11. **Check**: Inspect your car for missed spots and touch up as needed.
What are the benefits of using vehicle detailing applicators?
Vehicle detailing applicators offer several benefits that enhance the car detailing process, ensuring a professional finish and protecting the vehicle's surfaces.
1. **Precision and Control**: Detailing applicators provide greater precision and control over the application of products like waxes, polishes, and sealants. This ensures even coverage and reduces the risk of over-application, which can lead to streaks or residue.
2. **Efficiency**: These tools are designed to make the application process faster and more efficient. They help in spreading products evenly across surfaces, reducing the time and effort required compared to manual application.
3. **Surface Protection**: Applicators are often made from materials that are gentle on vehicle surfaces, such as microfiber or foam. This minimizes the risk of scratches or damage, preserving the vehicle's paint and finish.
4. **Product Conservation**: By ensuring even distribution, applicators help in conserving detailing products. This not only saves money but also ensures that the right amount of product is used for optimal results.
5. **Versatility**: Different types of applicators are available for various detailing tasks, from applying wax to cleaning interiors. This versatility allows for specialized care tailored to each part of the vehicle.
6. **Professional Results**: Using applicators can lead to a more professional-looking finish. They help achieve a high-gloss shine and a smooth, even coat that enhances the vehicle's appearance.
7. **Ergonomic Design**: Many applicators are designed to be comfortable to hold and use, reducing hand fatigue during extended detailing sessions.
Overall, vehicle detailing applicators are essential tools for achieving high-quality, efficient, and safe detailing results.
How can I dry my car without leaving streaks?
To dry your car without leaving streaks, follow these steps:
1. **Wash Thoroughly**: Begin with a thorough wash using a quality car shampoo. Rinse well to remove all soap residues, as leftover soap can cause streaks.
2. **Use Quality Water**: Rinse with deionized or distilled water if possible. Hard water can leave mineral deposits that cause streaks.
3. **Dry Quickly**: Dry the car immediately after rinsing to prevent water spots. Work in a shaded area to avoid the sun drying the water too quickly.
4. **Use Microfiber Towels**: Opt for high-quality, clean microfiber towels. They are absorbent and gentle on the paint, reducing the risk of streaks and scratches.
5. **Blot, Don’t Wipe**: Use a blotting technique rather than wiping. This minimizes the risk of streaks and reduces friction on the paint.
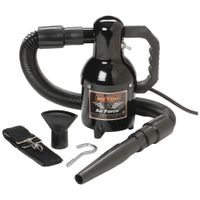
6. **Use a Leaf Blower**: A leaf blower or a car dryer can effectively remove water from crevices and surfaces without contact, reducing streaks.
7. **Detailing Spray**: After drying, use a detailing spray or quick detailer. It helps remove any remaining water spots and adds a layer of shine.
8. **Check for Residual Water**: Inspect areas like mirrors, door handles, and trim for trapped water. Use a microfiber towel to absorb any remaining droplets.
9. **Final Buff**: Once dry, use a clean, dry microfiber towel to buff the surface lightly. This ensures any remaining streaks are removed and enhances the shine.
10. **Regular Maintenance**: Regularly waxing your car can help water bead off more easily, reducing the amount of drying needed and minimizing streaks.
What is the best method to polish a car's body paint?
The best method to polish a car's body paint involves several steps to ensure a high-quality finish. Start by thoroughly washing the car to remove dirt and debris. Use a pH-balanced car shampoo and a microfiber wash mitt to prevent scratches. Rinse and dry the car with a microfiber towel.
Next, inspect the paint for imperfections like scratches, swirls, or oxidation. If necessary, use a clay bar to remove embedded contaminants. Lubricate the surface with a clay lubricant and gently glide the clay bar over the paint.
Choose a suitable polish based on the condition of the paint. For minor imperfections, a light polish or finishing polish is sufficient. For more severe defects, a compound or cutting polish may be needed. Apply the polish using a dual-action (DA) polisher for even results. Attach a foam or microfiber pad to the polisher, apply a small amount of polish to the pad, and spread it over a small section of the car.
Work the polish into the paint using overlapping passes, applying light to moderate pressure. Keep the polisher moving to avoid overheating the paint. Once the polish has broken down, wipe off the residue with a clean microfiber towel.
After polishing, apply a paint sealant or wax to protect the finish and enhance the shine. Use a foam applicator pad to apply the product in a thin, even layer. Allow it to cure according to the manufacturer's instructions, then buff off the residue with a microfiber towel.
Regular maintenance, including washing and waxing, will help preserve the polished finish.