Call +(254) 703 030 000 / 751 483 999 / 721 704 777
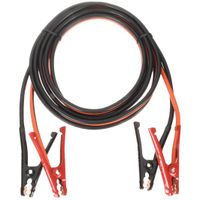
Jumper Cables & Clamps
Jumper cables are a pair of thick electric cables fitted with metal clamps at either end, used for starting a vehicle by connecting its dead battery to the battery of another running vehicle. The cables facilitate the movement of voltage from a working battery to a dead vehicle battery. Jumper cable .....Read More

Frequently Asked Questions
What are jumper cables used for?
Jumper cables are used to jump-start a vehicle with a dead or discharged battery. They are a set of insulated wires with alligator clips at each end, typically color-coded red for positive and black for negative. The primary function of jumper cables is to transfer electrical current from a charged battery in a donor vehicle to the dead battery in the recipient vehicle, enabling the latter to start its engine.
To use jumper cables, the vehicles are positioned close enough for the cables to reach both batteries. The process begins by connecting the red clip to the positive terminal of the dead battery and the other red clip to the positive terminal of the charged battery. Next, the black clip is attached to the negative terminal of the charged battery. The remaining black clip is then connected to an unpainted metal surface on the engine block or chassis of the vehicle with the dead battery, away from the battery itself, to prevent sparking near the battery.
Once the connections are secure, the donor vehicle is started and allowed to run for a few minutes to charge the dead battery. Afterward, the recipient vehicle is started. If successful, the engine will turn over, and the vehicle will start. The cables are then removed in reverse order: black clip from the engine block, black clip from the charged battery, red clip from the charged battery, and finally, the red clip from the dead battery.
Jumper cables are essential for emergency roadside assistance, providing a quick and effective solution to battery-related issues, and are a staple in many vehicle emergency kits.
How do you use jumper cables to start a car?
1. **Safety First**: Ensure both cars are off, in park (or neutral for manual), and the parking brakes are engaged. Wear safety glasses and gloves if available.
2. **Position the Cars**: Park the working car close enough to the dead car so the jumper cables can reach both batteries, but ensure they do not touch.
3. **Identify Terminals**: Locate the positive (+) and negative (-) terminals on both car batteries.
4. **Connect Jumper Cables**:
- Attach one red clamp to the positive terminal of the dead battery.
- Attach the other red clamp to the positive terminal of the working battery.
- Attach one black clamp to the negative terminal of the working battery.
- Attach the other black clamp to an unpainted metal surface on the dead car, away from the battery (like a bolt on the engine block).
5. **Start the Working Car**: Turn on the engine of the working car and let it run for a few minutes.
6. **Start the Dead Car**: Attempt to start the car with the dead battery. If it doesn’t start, wait a few more minutes and try again.
7. **Remove Jumper Cables**: Once the dead car starts, carefully remove the cables in reverse order:
- Remove the black clamp from the metal surface on the dead car.
- Remove the black clamp from the negative terminal of the working battery.
- Remove the red clamp from the positive terminal of the working battery.
- Remove the red clamp from the positive terminal of the dead battery.
8. **Let the Engine Run**: Keep the revived car running for at least 15-30 minutes to allow the alternator to charge the battery.
9. **Drive Safely**: If the car doesn’t start again, the battery or alternator may need replacement.
What color is positive on jumper cables?
Red.
Can you use jumper cables on any car?
No, you cannot use jumper cables on any car without considering several factors. First, ensure both vehicles have the same voltage system, typically 12 volts for most modern cars. Using jumper cables on a vehicle with a different voltage system can cause severe damage.
Second, check the battery type. Some vehicles, especially hybrids and electric cars, have specialized batteries that may not be compatible with traditional jumper cables. Consult the vehicle's manual for specific instructions.
Third, inspect the condition of the batteries and cables. Damaged or corroded batteries and cables can pose safety risks, including sparks or explosions. Ensure the cables are in good condition and the battery terminals are clean.
Fourth, consider the vehicle's electrical system. Some modern cars have sensitive electronics that can be damaged by a power surge during jump-starting. Using a jump starter with surge protection or consulting a professional may be advisable.
Fifth, follow the correct procedure for connecting and disconnecting the cables. Connect the positive (red) cable to the positive terminals of both batteries, then connect the negative (black) cable to the negative terminal of the donor battery and a grounded metal part of the dead car, away from the battery. This reduces the risk of sparks near the battery.
Finally, ensure both vehicles are in a safe location, away from traffic, and that the engines are off before connecting the cables. After starting the dead car, remove the cables in reverse order.
In summary, while jumper cables can be used on many cars, compatibility, battery type, condition, and proper procedure must be considered to avoid damage or injury.
How long should you leave jumper cables on?
Leave the jumper cables connected for about 5 minutes after starting the dead vehicle. This allows the battery to gain enough charge to continue running. After starting, let the engine run for at least 15-30 minutes to ensure the battery is sufficiently charged.
What happens if you connect jumper cables wrong?
Connecting jumper cables incorrectly can lead to several issues:
1. **Reverse Polarity**: If the positive and negative cables are connected to the wrong terminals, it can cause a reverse polarity situation. This can lead to severe damage to the vehicle's electrical system, including the battery, alternator, and electronic components.
2. **Sparks and Short Circuits**: Incorrect connections can cause sparks, which may lead to a short circuit. This can damage the battery and potentially cause a fire or explosion, especially if there is a hydrogen gas buildup around the battery.
3. **Battery Damage**: The battery receiving the charge can be damaged due to overcharging or reverse charging, leading to reduced battery life or complete failure.
4. **Electronic Component Damage**: Modern vehicles have sensitive electronic systems. Incorrect connections can send a surge of electricity through these systems, potentially damaging the car's computer, sensors, and other electronic components.
5. **Cable Damage**: The jumper cables themselves can overheat and become damaged if connected improperly, especially if they are not designed to handle the resulting electrical load.
6. **Personal Injury**: There is a risk of personal injury from electric shock, burns from hot cables, or injury from battery explosion.
To avoid these issues, always ensure the positive cable (usually red) is connected to the positive terminals of both batteries, and the negative cable (usually black) is connected to the negative terminal of the good battery and a metal ground on the car with the dead battery.
How do you know if jumper cables are working?
To determine if jumper cables are working, follow these steps:
1. **Visual Inspection**: Check the cables for any visible damage, such as frayed wires, exposed metal, or damaged clamps. Ensure the cables are free from corrosion and dirt.
2. **Proper Connection**: Connect the cables correctly. Attach one red clamp to the positive terminal of the dead battery and the other red clamp to the positive terminal of the good battery. Connect one black clamp to the negative terminal of the good battery and the other black clamp to an unpainted metal surface on the engine block or frame of the car with the dead battery.
3. **Check for Sparks**: When making the final connection, you might see a small spark. This indicates that the circuit is complete and the cables are conducting electricity.
4. **Start the Working Car**: Start the engine of the car with the good battery. Let it run for a few minutes to allow the dead battery to charge.
5. **Attempt to Start the Dead Car**: Try to start the car with the dead battery. If it starts, the jumper cables are working. If it doesn’t, wait a few more minutes and try again.
6. **Check for Heat**: After a few minutes, carefully touch the cables to see if they are warm. Warmth indicates that current is flowing through the cables.
7. **Voltage Test**: Use a multimeter to test the voltage across the clamps. A reading close to 12 volts indicates that the cables are conducting electricity.
If the car with the dead battery starts, the jumper cables are functioning properly. If not, recheck the connections, ensure the donor battery is fully charged, and inspect the cables for any issues.