Call +(254) 703 030 000 / 751 483 999 / 721 704 777
Vehicle Engine Maintenance
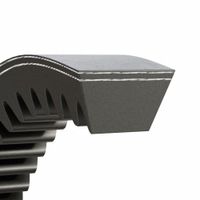
Vehicle engine maintenance products repair and replace worn parts in the engine assembly. Vehicle belts mount onto pulleys to transmit power between rotational shafts in automotive applications. Belt tensioners maintain constant tension on the belt in an automotive accessory drive system. Belt idler .....Read More
Frequently Asked Questions
What are the signs that a vehicle belt needs replacement?
1. **Squealing or Chirping Noises**: Unusual noises when starting the engine or during acceleration can indicate a worn or loose belt.
2. **Visible Cracks or Fraying**: Inspect the belt for any visible signs of wear, such as cracks, fraying, or splits on the surface.
3. **Glazing**: A shiny or glazed appearance on the belt's surface suggests it has been slipping and may need replacement.
4. **Loss of Tension**: If the belt feels loose or can be easily moved, it may have lost tension, indicating wear or a need for adjustment.
5. **Vibrations or Slippage**: If the belt slips off the pulleys or causes vibrations, it may be stretched or misaligned.
6. **Engine Overheating**: A failing belt can affect the water pump, leading to engine overheating.
7. **Malfunctioning Accessories**: If components like the alternator, power steering, or air conditioning are not functioning properly, the belt may be the issue.
8. **Age and Mileage**: Belts should be replaced according to the vehicle manufacturer's recommended schedule, typically every 60,000 to 100,000 miles.
9. **Belt Wear Indicator**: Some vehicles have a belt wear indicator that signals when a replacement is needed.
10. **Burning Rubber Smell**: A burning smell can indicate a slipping belt, which generates excessive heat.
11. **Dashboard Warning Lights**: Warning lights related to the battery or engine may illuminate if the belt is failing.
12. **Excessive Wear on Belt Edges**: Uneven wear on the edges of the belt can indicate misalignment or pulley issues.
13. **Frequent Belt Adjustments**: If the belt requires frequent tightening, it may be time for a replacement.
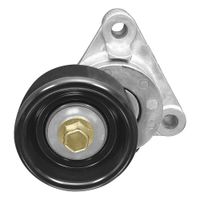
How do I know if my belt tensioner is failing?
Signs of a failing belt tensioner include:
1. **Unusual Noises**: Listen for squealing, chirping, or grinding noises coming from the front of the vehicle. These sounds often indicate that the tensioner is not maintaining proper tension on the belt.
2. **Belt Wear**: Inspect the serpentine or drive belt for signs of wear such as fraying, cracking, or glazing. A failing tensioner can cause uneven wear on the belt.
3. **Visible Damage**: Check the tensioner for visible signs of damage or wear, such as cracks, rust, or misalignment. The tensioner should move smoothly without any jerking or sticking.
4. **Belt Slippage**: If the belt is slipping off the pulleys, it may indicate that the tensioner is not applying adequate pressure to keep the belt in place.
5. **Engine Performance Issues**: A loose or slipping belt can lead to poor engine performance, as it may not drive the alternator, water pump, or other accessories effectively.
6. **Warning Lights**: Look for dashboard warning lights, such as the battery light, which may illuminate if the alternator is not charging the battery properly due to belt slippage.
7. **Vibrations**: Feel for unusual vibrations in the engine compartment, which can occur if the tensioner is not maintaining proper belt tension.
8. **Manual Inspection**: With the engine off, manually check the tensioner by applying pressure to see if it moves easily. It should have a firm resistance and return to its original position smoothly.
If you notice any of these symptoms, it may be time to have the belt tensioner inspected and possibly replaced by a professional mechanic.
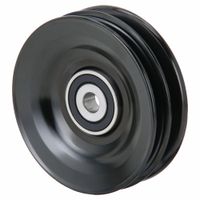
What is the purpose of an idler pulley in a vehicle?
The purpose of an idler pulley in a vehicle is to maintain proper tension and guide the drive belt or serpentine belt, which is responsible for transmitting power from the engine to various components such as the alternator, power steering pump, air conditioning compressor, and water pump. The idler pulley serves several key functions:
1. **Tension Maintenance**: It helps maintain the correct tension on the drive belt, ensuring efficient power transmission and preventing slippage. Proper tension is crucial for the optimal performance of belt-driven accessories.
2. **Belt Routing**: The idler pulley aids in routing the belt around various engine components, ensuring that the belt follows the correct path and maintains contact with the pulleys of the driven accessories.
3. **Vibration Reduction**: By maintaining tension and alignment, the idler pulley helps reduce vibrations and noise that can occur when the belt is in motion, contributing to a smoother and quieter engine operation.
4. **Wear Prevention**: Proper tension and alignment provided by the idler pulley help prevent premature wear and tear on the belt and other components, extending their lifespan and reducing the need for frequent replacements.
5. **Compensation for Belt Stretch**: Over time, belts can stretch due to heat and wear. The idler pulley compensates for this stretching, ensuring that the belt remains tight and functional.
Overall, the idler pulley is a critical component in the belt drive system, ensuring that the engine's power is efficiently and reliably transmitted to essential vehicle systems.
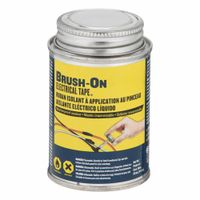
How do I apply brush-on electrical tape correctly?
1. **Preparation**: Ensure the surface is clean, dry, and free from dust, oil, or any contaminants. Use a cloth and a suitable cleaner if necessary.
2. **Safety**: Wear gloves and work in a well-ventilated area to avoid inhaling fumes.
3. **Stirring**: Open the brush-on electrical tape container and stir the contents thoroughly to ensure an even consistency.
4. **Application**: Use the attached brush or a small paintbrush to apply a thin, even coat over the area you wish to insulate. Ensure complete coverage, especially around edges and corners.
5. **Layering**: Allow the first coat to dry completely, as per the manufacturer's instructions, usually around 5-10 minutes. Apply additional coats as needed for increased insulation and durability, allowing each layer to dry before applying the next.
6. **Drying**: Let the final coat dry completely. This may take several hours, depending on the product and environmental conditions.
7. **Inspection**: Once dry, inspect the coating for any missed spots or thin areas. Reapply if necessary.
8. **Storage**: Seal the container tightly after use to prevent the product from drying out. Store in a cool, dry place.
9. **Cleanup**: Clean brushes and any spills immediately with a suitable solvent, as recommended by the manufacturer.
10. **Testing**: Before use, test the insulated area to ensure proper adhesion and insulation.
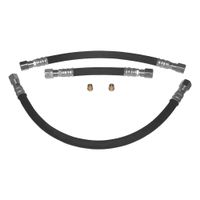
What are the symptoms of a failing air intake hose?
Symptoms of a failing air intake hose include:
1. **Decreased Engine Performance**: A damaged air intake hose can lead to reduced airflow to the engine, causing a noticeable drop in power, acceleration, and overall engine performance.
2. **Check Engine Light**: A malfunctioning air intake hose can trigger the check engine light. The vehicle's computer may detect irregularities in air flow and signal a problem.
3. **Rough Idling**: If the air intake hose is cracked or leaking, it can cause the engine to idle roughly or inconsistently due to improper air-fuel mixture.
4. **Hissing or Sucking Noises**: A compromised air intake hose may produce unusual hissing or sucking sounds, especially when the engine is running, indicating air escaping or being drawn in improperly.
5. **Poor Fuel Efficiency**: A failing air intake hose can lead to an incorrect air-fuel ratio, causing the engine to burn more fuel than necessary, thus reducing fuel efficiency.
6. **Stalling or Hesitation**: The engine may stall or hesitate during acceleration if the air intake hose is not delivering the correct amount of air to the engine.
7. **Backfiring**: An improper air-fuel mixture due to a faulty air intake hose can cause backfiring, where unburned fuel ignites in the exhaust system.
8. **Increased Emissions**: A damaged air intake hose can lead to higher emissions as the engine struggles to maintain the correct air-fuel balance.
9. **Visible Damage**: Physical inspection may reveal cracks, holes, or disconnections in the air intake hose, indicating it needs replacement.
Addressing these symptoms promptly can prevent further engine damage and maintain vehicle performance.
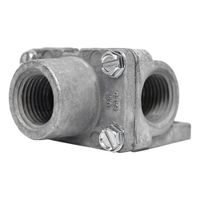
How can I tell if my fuel valve is malfunctioning?
1. **Engine Performance Issues**: If your engine is sputtering, stalling, or not starting, it could indicate a malfunctioning fuel valve restricting fuel flow.
2. **Fuel Leaks**: Check for fuel leaks around the valve. A faulty valve may not seal properly, causing leaks.
3. **Unusual Noises**: Listen for unusual sounds like hissing or whistling near the fuel valve, which may indicate a leak or pressure issue.
4. **Fuel Smell**: A strong fuel odor around the valve area can suggest a leak or improper sealing.
5. **Visual Inspection**: Look for visible signs of damage, corrosion, or wear on the valve and its connections.
6. **Fuel Pressure Test**: Conduct a fuel pressure test to see if the valve is allowing the correct amount of fuel to pass through.
7. **Check Engine Light**: A malfunctioning fuel valve might trigger the check engine light. Use a diagnostic tool to read any error codes.
8. **Manual Operation**: If accessible, manually operate the valve to see if it moves smoothly. Stiffness or resistance can indicate a problem.
9. **Fuel Consumption**: Notice any sudden changes in fuel consumption, which could be due to a valve not regulating fuel properly.
10. **Professional Inspection**: If unsure, have a professional mechanic inspect the valve for any issues.
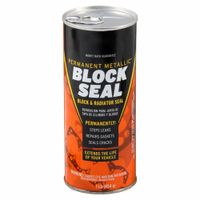
What are the best practices for using repair sealants on engine components?
1. **Surface Preparation**: Ensure all surfaces are clean, dry, and free from oil, grease, and old sealant residues. Use a suitable solvent or cleaner to achieve a contaminant-free surface.
2. **Correct Sealant Selection**: Choose the appropriate sealant for the specific engine component and operating conditions. Consider factors like temperature resistance, chemical compatibility, and flexibility.
3. **Application Method**: Apply the sealant evenly and consistently. Use a caulking gun for precise application, ensuring a uniform bead. Avoid excessive application to prevent overflow into engine components.
4. **Curing Time**: Allow adequate curing time as specified by the manufacturer. This ensures the sealant achieves its full bonding and sealing properties. Avoid operating the engine until the sealant is fully cured.
5. **Temperature Considerations**: Apply sealants within the recommended temperature range. Extreme temperatures can affect the sealant’s performance and curing process.
6. **Joint Design**: Ensure the joint design accommodates the sealant’s properties, such as flexibility and expansion. This helps maintain a durable seal under varying operating conditions.
7. **Compatibility Check**: Verify that the sealant is compatible with the materials of the engine components to prevent chemical reactions or degradation.
8. **Pressure Testing**: After application and curing, conduct pressure tests to ensure the sealant has formed an effective seal and there are no leaks.
9. **Storage and Handling**: Store sealants as per manufacturer guidelines to maintain their efficacy. Handle with care to avoid contamination or premature curing.
10. **Safety Precautions**: Follow safety guidelines, including wearing protective gear and ensuring proper ventilation during application to avoid inhalation of fumes.
11. **Documentation**: Keep records of the sealant type, application date, and any observations for future reference and maintenance planning.