Call +(254) 703 030 000 / 751 483 999 / 721 704 777
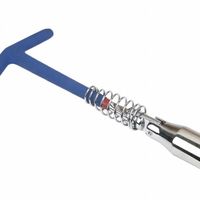
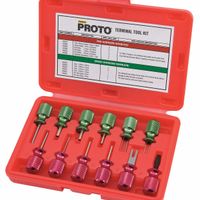
Vehicle Electrical & Lighting Tools
Vehicle electrical tools repair batteries and electrical circuits. Battery equipment connects, recharges, and jump-starts vehicle batteries. Accessories support and extend the life of the batteries. Vehicle lighting tools make the vehicle more visible especially in low light conditions or bad weathe .....Read More

Frequently Asked Questions
How do I jump-start a car battery?
1. **Safety First**: Ensure both vehicles are turned off, and the keys are removed. Wear safety glasses and gloves if available.
2. **Position the Vehicles**: Park the working vehicle close to the dead vehicle, ensuring they do not touch. The batteries should be as close as possible.
3. **Prepare the Jumper Cables**: Untangle the cables and ensure they are not damaged. Identify the red (positive) and black (negative) clamps.
4. **Connect the Jumper Cables**:
- Attach one red clamp to the positive terminal of the dead battery.
- Attach the other red clamp to the positive terminal of the good battery.
- Attach one black clamp to the negative terminal of the good battery.
- Attach the other black clamp to an unpainted metal surface on the engine block or frame of the dead vehicle, away from the battery.
5. **Start the Working Vehicle**: Turn on the engine of the vehicle with the good battery and let it run for a few minutes.
6. **Start the Dead Vehicle**: Attempt to start the vehicle with the dead battery. If it doesn’t start, wait a few more minutes and try again.
7. **Remove the Jumper Cables**: Once the dead vehicle starts, carefully remove the cables in reverse order:
- Remove the black clamp from the metal surface of the dead vehicle.
- Remove the black clamp from the negative terminal of the good battery.
- Remove the red clamp from the positive terminal of the good battery.
- Remove the red clamp from the positive terminal of the dead battery.
8. **Let the Engine Run**: Keep the revived vehicle running for at least 15-30 minutes to allow the alternator to charge the battery.
9. **Drive and Monitor**: Drive the vehicle for a while to ensure the battery holds the charge. If issues persist, consider battery replacement or professional inspection.
What are the best tools for testing vehicle electrical circuits?
The best tools for testing vehicle electrical circuits include:
1. **Multimeter**: Essential for measuring voltage, current, and resistance. It helps diagnose battery issues, check alternator output, and test circuit continuity.
2. **Test Light**: A simple tool to check for the presence of voltage in a circuit. It's useful for quick checks of fuses, switches, and connections.
3. **Power Probe**: Offers more functionality than a test light, allowing technicians to apply power or ground to a circuit, which is useful for testing components like motors and lights.
4. **Oscilloscope**: Provides a visual representation of electrical signals, crucial for diagnosing complex issues in sensors and control modules.
5. **Circuit Tester**: Specifically designed for automotive use, it can test fuses, relays, and wiring harnesses efficiently.
6. **OBD-II Scanner**: While primarily for engine diagnostics, it can also identify electrical issues related to sensors and control modules.
7. **Battery Load Tester**: Evaluates the condition of a vehicle's battery by applying a load and measuring its response, ensuring reliable starting power.
8. **Clamp Meter**: Measures current without disconnecting the circuit, ideal for testing alternator output and parasitic draw.
9. **Wire Piercing Probe**: Allows for testing of wires without damaging insulation, useful for checking continuity and voltage in hard-to-reach areas.
10. **Relay Tester**: Specifically tests the functionality of relays, ensuring they are operating correctly within the circuit.
These tools, when used together, provide a comprehensive approach to diagnosing and repairing vehicle electrical systems, ensuring reliability and performance.
How can I extend the life of my car battery?
To extend the life of your car battery, follow these steps:
1. **Regular Maintenance**: Check the battery terminals for corrosion and clean them with a mixture of baking soda and water. Ensure the connections are tight.
2. **Avoid Short Trips**: Short trips prevent the battery from fully charging. Combine errands to allow the battery to recharge fully.
3. **Limit Power Usage**: Turn off lights, radio, and other electronics when the engine is off to prevent battery drain.
4. **Temperature Management**: Extreme temperatures can affect battery life. Park in shaded areas during summer and use a battery blanket in winter.
5. **Regular Testing**: Test your battery's charge level regularly, especially before long trips or after extreme weather conditions.
6. **Secure the Battery**: Ensure the battery is properly secured to prevent vibrations, which can cause internal damage.
7. **Avoid Deep Discharges**: Try not to let the battery discharge completely. If the car is not used often, consider using a trickle charger.
8. **Check the Alternator**: Ensure the alternator is functioning properly, as a faulty alternator can lead to undercharging or overcharging the battery.
9. **Battery Replacement**: Replace the battery every 3-5 years, depending on usage and climate conditions.
10. **Use the Right Battery**: Ensure the battery is the correct size and type for your vehicle to avoid unnecessary strain.
By following these practices, you can significantly extend the life of your car battery, ensuring reliable performance and reducing the need for frequent replacements.
What causes a car battery to drain quickly?
A car battery can drain quickly due to several factors:
1. **Parasitic Drain**: Electrical components like clocks, alarms, and onboard computers draw power even when the car is off. Excessive parasitic drain, often due to faulty wiring or malfunctioning components, can deplete the battery.
2. **Faulty Charging System**: If the alternator or voltage regulator fails, the battery may not recharge properly while driving, leading to a quick drain.
3. **Old or Weak Battery**: Over time, batteries lose their ability to hold a charge. An old or weak battery will drain faster, especially in extreme temperatures.
4. **Corroded or Loose Connections**: Corrosion on battery terminals or loose connections can impede the flow of electricity, causing the battery to drain as it struggles to power the vehicle.
5. **Extreme Temperatures**: Both hot and cold temperatures can affect battery performance. Cold weather can slow down the chemical reactions inside the battery, while heat can increase the rate of self-discharge.
6. **Frequent Short Trips**: Short trips don’t allow the alternator enough time to recharge the battery fully, leading to gradual depletion.
7. **Excessive Use of Accessories**: Using high-power accessories like headlights, air conditioning, or infotainment systems while the engine is off can quickly drain the battery.
8. **Defective Alternator Diode**: A bad diode in the alternator can cause the battery to drain when the car is off, as it allows current to flow in the wrong direction.
9. **Leaving Lights On**: Forgetting to turn off headlights or interior lights can rapidly deplete the battery.
10. **Electrical System Faults**: Short circuits or other electrical system issues can cause the battery to drain unexpectedly.
Regular maintenance and checks can help identify and mitigate these issues, ensuring the battery remains in good condition.
How do I properly connect and disconnect a car battery?
To properly connect and disconnect a car battery, follow these steps:
**Disconnecting a Car Battery:**
1. **Turn Off the Engine:** Ensure the car is turned off and the keys are removed from the ignition.
2. **Safety First:** Wear safety goggles and gloves to protect against acid and sparks.
3. **Locate the Battery:** Open the hood and locate the battery, usually found on one side of the engine bay.
4. **Identify Terminals:** Identify the positive (+) and negative (-) terminals. The positive terminal is often covered with a red cap.
5. **Disconnect Negative Terminal First:** Using a wrench, loosen the nut on the negative terminal and remove the cable. This minimizes the risk of short-circuiting.
6. **Disconnect Positive Terminal:** Repeat the process for the positive terminal.
7. **Remove the Battery:** If necessary, remove any securing bracket and carefully lift the battery out of the vehicle.
**Connecting a Car Battery:**
1. **Inspect the Battery:** Ensure the battery is clean and free of corrosion. Clean terminals if needed.
2. **Place the Battery:** Carefully place the battery in the tray and secure it with the bracket.
3. **Connect Positive Terminal First:** Attach the positive cable to the positive terminal and tighten the nut with a wrench.
4. **Connect Negative Terminal:** Attach the negative cable to the negative terminal and tighten the nut.
5. **Check Connections:** Ensure all connections are tight and secure.
6. **Test the Battery:** Start the car to ensure the battery is connected properly and functioning.
7. **Dispose of Old Battery:** If replacing, dispose of the old battery at a recycling center.
Always follow the vehicle’s manual for specific instructions and safety precautions.
What are common signs of a failing car battery?
Common signs of a failing car battery include:
1. **Slow Engine Crank**: The engine takes longer to start, or cranks slowly when you turn the ignition.
2. **Dim Lights**: Headlights and interior lights appear dimmer than usual, indicating insufficient power.
3. **Electrical Issues**: Malfunctions in electrical components like power windows, radio, or dashboard lights.
4. **Check Engine Light**: The check engine or battery warning light on the dashboard may illuminate.
5. **Swollen Battery Case**: The battery case appears bloated or swollen, often due to excessive heat.
6. **Corroded Terminals**: Visible corrosion or a white, ashy substance on the battery terminals and cables.
7. **Old Age**: Batteries typically last 3-5 years. An older battery is more prone to failure.
8. **Frequent Jump Starts**: Needing frequent jump starts is a clear sign of a failing battery.
9. **Unusual Odor**: A rotten egg smell indicates a leaking battery, often due to sulfuric acid.
10. **Low Battery Fluid Level**: If the fluid level is below the lead plates inside, it can indicate a failing battery.
11. **Backfiring**: A weak battery can cause intermittent sparks, leading to engine backfiring.
12. **Clicking Sound**: A clicking noise when turning the key suggests insufficient power to start the engine.
13. **Battery Test Results**: A professional test showing low voltage or poor performance confirms battery issues.
Recognizing these signs early can prevent unexpected breakdowns and ensure timely battery replacement.
How do I troubleshoot vehicle lighting issues?
To troubleshoot vehicle lighting issues, follow these steps:
1. **Check the Bulbs**: Inspect the bulbs for any signs of damage or burnout. Replace any faulty bulbs with the correct type specified in the vehicle's manual.
2. **Inspect the Fuses**: Locate the vehicle's fuse box, often found under the dashboard or in the engine compartment. Use the diagram on the fuse box cover to identify the lighting fuses. Replace any blown fuses with ones of the same amperage.
3. **Examine the Wiring**: Look for any visible damage, corrosion, or loose connections in the wiring harnesses connected to the lights. Repair or replace damaged wires and ensure all connections are secure.
4. **Test the Switches**: Check the headlight and other lighting switches for proper operation. If a switch feels loose or fails to activate the lights, it may need replacement.
5. **Check the Relays**: Identify the relays associated with the lighting system, usually located in the fuse box. Swap a suspect relay with a similar one to see if the issue resolves, indicating a faulty relay.
6. **Inspect the Ground Connections**: Ensure all ground connections are clean and secure. Corroded or loose grounds can cause lighting issues.
7. **Examine the Battery and Alternator**: Ensure the battery is fully charged and the alternator is functioning correctly, as insufficient power can affect lighting performance.
8. **Use a Multimeter**: Test for voltage at various points in the lighting circuit to identify where power is lost. This can help pinpoint issues like broken wires or faulty components.
9. **Consult the Manual**: Refer to the vehicle's manual for specific troubleshooting tips and diagrams related to the lighting system.
10. **Seek Professional Help**: If the issue persists, consult a professional mechanic for a thorough diagnosis and repair.