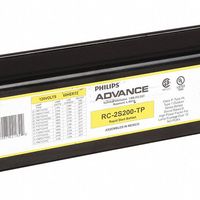
Fluorescent Ballasts

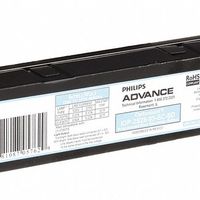
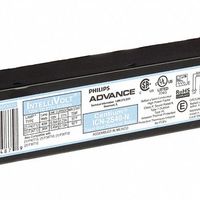
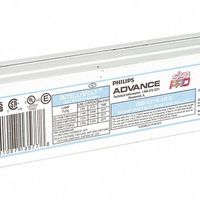
Fluorescent ballasts install into compatible lighting fixtures to protect linear fluorescent and CFL lamps from damaging power fluctuations that affect the lamp's output quality. They provide an initial voltage spike to turn on the lamps, then regulate the voltage and current. Electronic fluorescent .....Read More

Frequently Asked Questions

What are the steps to install a fluorescent ballast?

1. **Turn Off Power**: Switch off the power to the fixture at the circuit breaker to ensure safety. 2. **Remove Fixture Cover**: Detach the fixture cover or lens to access the fluorescent tubes and ballast. 3. **Remove Fluorescent Tubes**: Carefully twist and remove the fluorescent tubes from the fixture. 4. **Access the Ballast**: Unscrew and remove the fixture's metal cover to expose the ballast and wiring. 5. **Disconnect Wiring**: Note the wiring configuration or take a photo. Disconnect the wires from the old ballast, usually by unscrewing wire nuts or cutting the wires close to the ballast. 6. **Remove Old Ballast**: Unscrew the old ballast from the fixture and remove it. 7. **Install New Ballast**: Position the new ballast in place and secure it with screws. 8. **Connect Wiring**: Match the wires from the new ballast to the fixture wires according to the wiring diagram on the ballast. Use wire nuts to secure the connections. 9. **Reattach Fixture Cover**: Replace the metal cover over the ballast and secure it with screws. 10. **Reinstall Fluorescent Tubes**: Insert the fluorescent tubes back into the fixture, ensuring they are properly seated. 11. **Replace Fixture Cover**: Reattach the fixture cover or lens. 12. **Restore Power**: Turn the power back on at the circuit breaker. 13. **Test the Fixture**: Turn on the light switch to ensure the fixture is working properly.

How do I know if my fluorescent ballast is compatible with my fixture?

To determine if your fluorescent ballast is compatible with your fixture, follow these steps: 1. **Check Fixture Specifications**: Look at the fixture's label or manual for specifications, including the type of ballast required (e.g., electronic or magnetic) and the lamp type (e.g., T8, T12). 2. **Ballast Type**: Ensure the ballast type matches the fixture's requirements. Electronic ballasts are more energy-efficient and quieter than magnetic ballasts. 3. **Lamp Compatibility**: Verify that the ballast supports the specific lamp type and size used in your fixture. Common types include T5, T8, and T12, each with different diameters and electrical requirements. 4. **Wattage and Voltage**: Confirm that the ballast's wattage and voltage ratings match those of the fixture and the lamps. Mismatched wattage can lead to poor performance or damage. 5. **Number of Lamps**: Ensure the ballast is designed to operate the number of lamps in your fixture. Ballasts are rated for specific lamp configurations, such as single, dual, or multiple lamps. 6. **Wiring Configuration**: Check that the ballast's wiring configuration is compatible with your fixture. Follow the wiring diagram on the ballast for proper installation. 7. **Brand and Model**: If possible, use a ballast from the same brand or model series as the original for better compatibility. 8. **Energy Efficiency**: Consider using a ballast with a high energy efficiency rating to reduce energy consumption and improve performance. 9. **Regulatory Compliance**: Ensure the ballast complies with local regulations and standards, such as UL or CE certifications. 10. **Consult Manufacturer**: If unsure, consult the fixture or ballast manufacturer for compatibility guidance. By following these steps, you can ensure that your fluorescent ballast is compatible with your fixture, ensuring optimal performance and safety.

What are the differences between electronic and magnetic ballasts?

Electronic ballasts and magnetic ballasts are devices used to regulate the current in fluorescent lamps and other gas-discharge lamps, but they differ in several key aspects: 1. **Technology**: - **Magnetic Ballasts**: Use electromagnetic induction to regulate current. They consist of a core and coil assembly. - **Electronic Ballasts**: Use electronic components to control the current, operating at a higher frequency. 2. **Efficiency**: - **Magnetic Ballasts**: Generally less efficient, leading to higher energy consumption. - **Electronic Ballasts**: More energy-efficient, reducing power consumption and operational costs. 3. **Size and Weight**: - **Magnetic Ballasts**: Larger and heavier due to the coil and core components. - **Electronic Ballasts**: Smaller and lighter, making them easier to install and handle. 4. **Performance**: - **Magnetic Ballasts**: Can cause flickering and produce a humming noise due to the 60 Hz operation frequency. - **Electronic Ballasts**: Operate at higher frequencies (20,000 Hz or more), eliminating flicker and noise. 5. **Lamp Life**: - **Magnetic Ballasts**: Shorter lamp life due to higher stress on the lamp. - **Electronic Ballasts**: Extend lamp life by providing a more stable current. 6. **Cost**: - **Magnetic Ballasts**: Generally cheaper upfront but may incur higher operational costs. - **Electronic Ballasts**: Higher initial cost but offer savings in energy and maintenance over time. 7. **Compatibility**: - **Magnetic Ballasts**: Compatible with older lamp technologies. - **Electronic Ballasts**: Designed for modern lamps, including compact fluorescents and LEDs. 8. **Environmental Impact**: - **Magnetic Ballasts**: Contain more materials and may have a higher environmental footprint. - **Electronic Ballasts**: More environmentally friendly due to energy efficiency and reduced material use.

How can I troubleshoot a fluorescent ballast that isn't working?

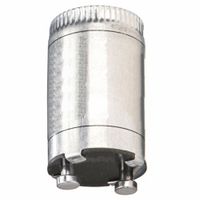
1. **Safety First**: Turn off the power to the fixture at the circuit breaker to avoid electrical shock. 2. **Visual Inspection**: Remove the fixture cover and inspect the ballast for any visible signs of damage, such as burn marks, leaking oil, or a swollen casing. 3. **Check the Bulbs**: Ensure the fluorescent tubes are properly seated in their sockets. Replace any burnt-out or flickering bulbs with new ones to rule out bulb failure. 4. **Test the Starter**: If the fixture uses a starter, replace it with a new one. Starters are inexpensive and can often be the cause of the problem. 5. **Inspect Wiring**: Examine the wiring connections to ensure they are secure and not damaged. Look for loose wires or corroded connections. 6. **Use a Multimeter**: With the power still off, use a multimeter to check for continuity in the ballast. Set the multimeter to the resistance (ohms) setting and test the ballast's input and output wires. A reading of infinite resistance indicates a faulty ballast. 7. **Check Voltage**: Turn the power back on and use the multimeter to measure the voltage at the ballast input. Ensure it matches the fixture's rated voltage. If there is no voltage, the issue may be with the power supply or wiring. 8. **Listen for Noise**: A humming or buzzing sound from the ballast can indicate a problem. If the ballast is noisy, it may need to be replaced. 9. **Replace the Ballast**: If all else fails, consider replacing the ballast. Ensure the new ballast matches the specifications of the old one, including voltage and lamp type. 10. **Professional Help**: If troubleshooting does not resolve the issue, consult a professional electrician to avoid potential hazards.

What are the benefits of using electronic ballasts over magnetic ones?

Electronic ballasts offer several advantages over magnetic ballasts: 1. **Energy Efficiency**: Electronic ballasts are more energy-efficient, reducing power consumption by 20-30% compared to magnetic ballasts. This efficiency translates to lower electricity bills and reduced environmental impact. 2. **Flicker Reduction**: They operate at a higher frequency (20,000 Hz or more), virtually eliminating the flicker associated with magnetic ballasts, which operate at 60 Hz. This reduction in flicker improves visual comfort and reduces eye strain. 3. **Instant Start and Dimming**: Electronic ballasts provide instant start capabilities and support dimming, offering greater control over lighting levels. This feature is particularly beneficial in settings where lighting needs vary throughout the day. 4. **Reduced Heat Output**: They generate less heat, contributing to a cooler operating environment. This reduction in heat can extend the lifespan of the lighting fixture and reduce cooling costs in temperature-controlled environments. 5. **Noise Reduction**: Electronic ballasts operate silently, eliminating the humming noise often associated with magnetic ballasts. This quiet operation is advantageous in environments where noise levels need to be minimized, such as offices and classrooms. 6. **Longer Lamp Life**: By providing a more stable and consistent current, electronic ballasts can extend the lifespan of fluorescent lamps, reducing maintenance costs and the frequency of replacements. 7. **Light Quality**: They improve light quality by providing a more consistent and stable light output, enhancing the overall lighting experience. 8. **Compact Size and Weight**: Electronic ballasts are smaller and lighter than magnetic ballasts, making them easier to install and integrate into various lighting fixtures. 9. **Environmental Impact**: They contain fewer hazardous materials and are more environmentally friendly, aligning with sustainability goals and regulations. Overall, electronic ballasts offer superior performance, efficiency, and versatility compared to magnetic ballasts, making them a preferred choice in modern lighting applications.

How do I choose the right ballast for my fluorescent lighting fixture?

To choose the right ballast for your fluorescent lighting fixture, consider the following factors: 1. **Lamp Type and Wattage**: Identify the type (T5, T8, T12) and wattage of your fluorescent lamps. The ballast must match the lamp type and wattage to ensure proper operation. 2. **Ballast Type**: Decide between electronic and magnetic ballasts. Electronic ballasts are more energy-efficient, quieter, and provide better light quality compared to magnetic ballasts. 3. **Number of Lamps**: Determine how many lamps the ballast will operate. Ballasts are designed to power a specific number of lamps, such as one, two, three, or four. 4. **Voltage**: Check the voltage requirements of your fixture and ensure the ballast is compatible. Common voltages include 120V, 277V, and 347V. 5. **Dimming Capability**: If you need dimmable lighting, select a ballast with dimming capabilities. Ensure compatibility with your dimming controls. 6. **Start Method**: Choose between instant start, rapid start, or programmed start ballasts. Instant start is energy-efficient but reduces lamp life. Rapid start provides a balance, while programmed start is ideal for frequent on/off cycles, extending lamp life. 7. **Ballast Factor**: Consider the ballast factor, which affects light output and energy consumption. A higher ballast factor increases light output but also energy use. 8. **Energy Efficiency**: Look for ballasts with high energy efficiency ratings to reduce electricity costs and environmental impact. 9. **Compatibility and Certification**: Ensure the ballast is compatible with your fixture and certified by relevant safety and performance standards, such as UL or CSA. 10. **Environment**: Consider the operating environment. For high-temperature or outdoor settings, choose a ballast designed for those conditions. By evaluating these factors, you can select the appropriate ballast for optimal performance and efficiency in your fluorescent lighting system.

Can I use a dimmable ballast with any fluorescent lamp?
No, you cannot use a dimmable ballast with any fluorescent lamp. Dimmable ballasts are specifically designed to work with certain types of fluorescent lamps that are compatible with dimming. Not all fluorescent lamps are designed to be dimmed, and using a dimmable ballast with a non-dimmable lamp can lead to poor performance, flickering, or even damage to the lamp and ballast. To ensure compatibility, you must check the specifications of both the ballast and the fluorescent lamp. The lamp must be labeled as dimmable, and the ballast must be compatible with the specific type of lamp you are using, such as T8, T5, or compact fluorescent lamps (CFLs). Additionally, the dimming range and control method (such as 0-10V, DALI, or phase-cut dimming) should be compatible between the ballast and the lamp. Using a dimmable ballast with a compatible dimmable fluorescent lamp allows for adjustable light levels, which can lead to energy savings and increased flexibility in lighting design. However, if the lamp is not designed for dimming, it is best to use a standard non-dimmable ballast to avoid potential issues. Always consult the manufacturer's guidelines and specifications to ensure proper compatibility and performance.