Call +(254) 703 030 000 / 751 483 999 / 721 704 777
Lighting Occupancy Sensors
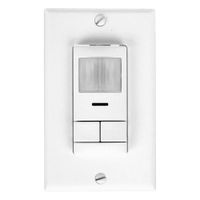
Occupancy sensors monitor a room and automatically switch off lights after occupants leave the room. They keep lights on while a room is occupied, then shut them off when the room is unoccupied to conserve energy and reduce electricity costs. Switch box mount sensors install into electrical boxes in .....Read More

Frequently Asked Questions
How do occupancy sensors work?
Occupancy sensors detect the presence or absence of people in a space to control lighting, HVAC systems, or other devices. They primarily use three types of technologies: passive infrared (PIR), ultrasonic, and microwave.
1. **Passive Infrared (PIR) Sensors**: These sensors detect changes in infrared radiation, which is emitted by all warm objects, including humans. PIR sensors have a lens that divides the detection area into zones. When a person moves between these zones, the sensor detects a change in infrared energy, triggering the connected system. PIR sensors are energy-efficient and best suited for spaces with clear lines of sight and minimal obstructions.
2. **Ultrasonic Sensors**: These sensors emit high-frequency sound waves that bounce off objects and return to the sensor. They detect occupancy by measuring the time it takes for the sound waves to return. Any movement in the room alters the return time, indicating presence. Ultrasonic sensors are effective in spaces with obstacles or partitions, as they can detect motion around corners and through materials like fabric.
3. **Microwave Sensors**: Similar to ultrasonic sensors, microwave sensors emit microwave signals and measure the reflection off moving objects. They are highly sensitive and can detect minor movements, even through walls. However, they are more expensive and can be prone to false triggers from movement outside the intended area.
Occupancy sensors can be standalone devices or integrated into building management systems. They help reduce energy consumption by ensuring lights and systems are only active when needed. Advanced sensors may combine multiple technologies for improved accuracy and reduced false positives. They can also be programmed with time delays and sensitivity adjustments to suit specific applications and environments.
What are the benefits of using occupancy sensors?
Occupancy sensors offer several benefits, primarily enhancing energy efficiency and convenience. They automatically control lighting and other systems based on the presence or absence of people, reducing energy consumption by ensuring that lights and devices are only on when needed. This leads to significant cost savings on utility bills, especially in commercial and large residential settings.
These sensors contribute to environmental sustainability by lowering energy usage, thus reducing the carbon footprint associated with electricity generation. They also extend the lifespan of lighting fixtures and other connected devices by minimizing their operating time, which reduces maintenance costs and the frequency of replacements.
Occupancy sensors improve convenience and comfort by automating lighting and climate control, eliminating the need for manual operation. This is particularly beneficial in spaces like restrooms, conference rooms, and hallways, where lights are often left on unintentionally. They enhance safety and security by ensuring that areas are well-lit when occupied, reducing the risk of accidents and deterring unauthorized access.
In smart building systems, occupancy sensors can integrate with other technologies to optimize building management, such as adjusting HVAC systems based on room occupancy to maintain optimal temperature and air quality. This integration can lead to more intelligent and responsive building environments.
Overall, occupancy sensors provide a cost-effective solution for improving energy efficiency, reducing environmental impact, and enhancing user experience in both residential and commercial settings.
How do you install an occupancy sensor?
1. **Turn Off Power**: Switch off the circuit breaker to the area where you will install the sensor to ensure safety.
2. **Remove Existing Switch**: Unscrew and remove the wall plate and the existing light switch. Carefully disconnect the wires from the switch.
3. **Prepare Wires**: Strip about 3/4 inch of insulation from the ends of the wires if needed. Identify the hot, load, neutral, and ground wires.
4. **Connect Wires**:
- **Hot Wire**: Connect the hot wire from the wall to the hot wire on the sensor.
- **Load Wire**: Connect the load wire from the sensor to the light fixture wire.
- **Neutral Wire**: Connect the neutral wire from the sensor to the neutral wire in the wall.
- **Ground Wire**: Connect the ground wire from the sensor to the ground wire in the wall.
5. **Mount Sensor**: Carefully tuck the wires into the electrical box and mount the sensor using screws. Attach the wall plate over the sensor.
6. **Adjust Settings**: Set the desired time delay and sensitivity on the sensor. This can usually be done using small dials or switches on the sensor.
7. **Restore Power**: Turn the circuit breaker back on to restore power to the circuit.
8. **Test Sensor**: Test the sensor by walking in front of it to ensure it activates the light. Adjust settings if necessary for optimal performance.
9. **Final Adjustments**: Make any final adjustments to the sensor’s position or settings to ensure it covers the desired area effectively.
10. **Secure Installation**: Ensure all screws and connections are tight and secure for safe operation.
What types of occupancy sensors are available?
Occupancy sensors are devices used to detect the presence of people in a space and are commonly used for lighting control, HVAC systems, and security. The main types of occupancy sensors include:
1. **Passive Infrared (PIR) Sensors**: These sensors detect motion by sensing changes in infrared radiation levels. They are most effective in detecting motion across their field of view and are commonly used in open spaces like offices and hallways.
2. **Ultrasonic Sensors**: These sensors emit ultrasonic sound waves and measure the reflection of these waves off moving objects. They are sensitive to minor movements and are suitable for areas with obstacles, such as restrooms or offices with partitions.
3. **Dual-Technology Sensors**: Combining PIR and ultrasonic technologies, these sensors offer enhanced accuracy by requiring both motion and heat changes to trigger. They reduce false positives and are ideal for spaces where reliability is crucial.
4. **Microwave Sensors**: Similar to ultrasonic sensors, microwave sensors emit microwave signals and detect changes in the reflected signals. They can penetrate through certain materials, making them suitable for concealed installations.
5. **Video Image Processing Sensors**: These sensors use cameras and image processing algorithms to detect occupancy. They can provide detailed information about the number of occupants and their locations, useful for advanced applications like smart building management.
6. **Acoustic Sensors**: These sensors detect sound levels to determine occupancy. They are less common and typically used in conjunction with other sensor types to improve accuracy.
7. **Capacitive Sensors**: These sensors detect changes in capacitance caused by the presence of a person. They are often used in specialized applications where other sensor types may not be effective.
Each type of sensor has its strengths and is chosen based on the specific requirements of the space, such as size, layout, and the level of sensitivity needed.
Can occupancy sensors be used with LED lights?
Yes, occupancy sensors can be used with LED lights. Occupancy sensors are devices that detect the presence or absence of people in a space and automatically turn lights on or off accordingly. They are commonly used to enhance energy efficiency and convenience in various settings, such as offices, homes, and public buildings.
LED lights are highly compatible with occupancy sensors for several reasons:
1. **Instant On/Off**: LED lights turn on and off instantly without any warm-up time, making them ideal for use with occupancy sensors that require immediate response to presence detection.
2. **Energy Efficiency**: Both LED lights and occupancy sensors are designed to save energy. LEDs consume significantly less power than traditional incandescent or fluorescent bulbs, and occupancy sensors further reduce energy consumption by ensuring lights are only on when needed.
3. **Longevity**: LEDs have a long lifespan, and using them with occupancy sensors can extend their life even further by reducing the total time they are on.
4. **Compatibility**: Most modern occupancy sensors are designed to work with a variety of lighting types, including LEDs. However, it is important to ensure that the sensor is compatible with the specific LED fixtures being used, as some older sensors may not work well with the low wattage of LEDs.
5. **Dimming Capabilities**: Many LED lights are dimmable, and some occupancy sensors offer dimming features, allowing for further customization of lighting levels based on occupancy.
In summary, using occupancy sensors with LED lights is a practical and efficient solution for reducing energy consumption and enhancing the functionality of lighting systems.
How do you adjust the sensitivity of an occupancy sensor?
To adjust the sensitivity of an occupancy sensor, follow these steps:
1. **Identify the Sensor Type**: Determine if the sensor is a PIR (Passive Infrared), ultrasonic, or dual-technology sensor, as the adjustment process may vary slightly.
2. **Access the Sensor Controls**: Locate the sensor's control panel. This is often found behind the sensor cover or on the side of the device. You may need a screwdriver to remove the cover.
3. **Locate the Sensitivity Adjustment**: Look for a dial, switch, or button labeled "sensitivity," "range," or similar. Some sensors have digital controls, while others use physical dials.
4. **Adjust the Sensitivity**:
- **For Dial Controls**: Turn the dial clockwise to increase sensitivity (detects smaller movements or at greater distances) and counterclockwise to decrease sensitivity.
- **For Digital Controls**: Use the buttons to navigate the menu and adjust the sensitivity setting. Refer to the user manual for specific instructions.
5. **Test the Sensor**: After adjustment, test the sensor by moving within its range to ensure it activates as desired. Walk in and out of the sensor's detection area to check its responsiveness.
6. **Fine-Tune if Necessary**: If the sensor is too sensitive (activating with minor movements) or not sensitive enough (failing to detect movement), make further adjustments. Repeat the testing process after each change.
7. **Secure the Sensor**: Once satisfied with the sensitivity setting, replace any covers or panels removed during the process.
8. **Consult the Manual**: If difficulties arise, consult the sensor's manual for model-specific guidance or troubleshooting tips.
9. **Consider Environmental Factors**: Be aware of environmental factors like temperature changes, airflow, or obstructions that might affect sensor performance and adjust accordingly.
What are common issues with occupancy sensors and how can they be fixed?
Common issues with occupancy sensors include:
1. **False Triggers**: Sensors may activate due to non-human movements like pets or air currents. Fix by adjusting sensitivity settings or repositioning the sensor to avoid these triggers.
2. **Limited Detection Range**: Sensors may not cover the entire area, leading to unlit zones. Fix by ensuring proper placement and possibly using multiple sensors to cover larger areas.
3. **Delayed Response**: Sensors may take too long to detect presence, causing inconvenience. Fix by adjusting the time delay settings to ensure quicker response times.
4. **Incompatibility with Lighting Systems**: Some sensors may not work well with certain lighting systems. Fix by ensuring compatibility before installation or using adapters if necessary.
5. **Interference from Obstacles**: Furniture or walls can block sensor signals. Fix by repositioning the sensor or removing obstacles that interfere with its line of sight.
6. **Power Supply Issues**: Battery-operated sensors may fail due to low power. Fix by regularly checking and replacing batteries or using wired sensors if feasible.
7. **Environmental Factors**: Temperature, humidity, or dust can affect sensor performance. Fix by choosing sensors designed for specific environmental conditions and maintaining them regularly.
8. **Incorrect Settings**: Improper configuration can lead to malfunction. Fix by carefully following the manufacturer’s setup instructions and adjusting settings as needed.
9. **Wear and Tear**: Over time, sensors may degrade. Fix by performing regular maintenance checks and replacing parts or the entire unit if necessary.
10. **Software Glitches**: Smart sensors may experience software issues. Fix by updating firmware regularly and resetting the device if problems persist.
Addressing these issues involves proper installation, regular maintenance, and ensuring compatibility with existing systems.