Call +(254) 703 030 000 / 751 483 999 / 721 704 777
- Home
- Lighting
- Lighting Fixtures Retrofit Kits
- Can Lights Downlights
Can Lights & Downlights
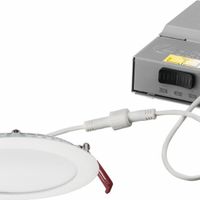
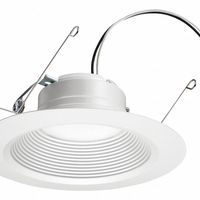
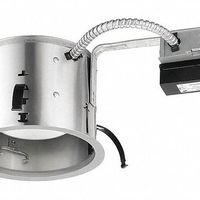
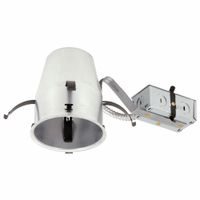
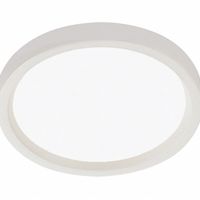
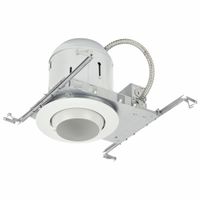
Can lights and downlights cast a narrow light beam downward for general lighting or accent lighting. Also known as pot lights, they bring light into corners, along corridors, and within reception areas where panels, troffers, and wraps would be too large. Can lighting illuminates multifamily housing .....Read More
Frequently Asked Questions
What are the benefits of using can lights and downlights?
Can lights and downlights offer several benefits that make them popular choices for both residential and commercial lighting:
1. **Space-Saving Design**: These lights are recessed into the ceiling, providing a sleek and unobtrusive look that maximizes space and maintains clean ceiling lines.
2. **Versatility**: Can lights and downlights are suitable for various applications, including general, task, and accent lighting. They can be used in kitchens, living rooms, hallways, and bathrooms, as well as in commercial settings like offices and retail spaces.
3. **Aesthetic Appeal**: Their minimalist design complements modern and contemporary interiors, enhancing the overall aesthetic without drawing attention away from other design elements.
4. **Even Light Distribution**: These lights provide uniform illumination, reducing shadows and glare, which is ideal for creating a comfortable and inviting atmosphere.
5. **Energy Efficiency**: Many can lights and downlights are compatible with LED bulbs, which consume less energy and have a longer lifespan compared to traditional incandescent bulbs, leading to cost savings on electricity bills.
6. **Dimmability**: Many models offer dimming capabilities, allowing users to adjust the brightness to suit different moods and activities, enhancing ambiance and energy efficiency.
7. **Directional Lighting**: Adjustable downlights can be angled to highlight specific areas or features, such as artwork or architectural details, providing flexibility in lighting design.
8. **Increased Property Value**: Modern lighting solutions like can lights and downlights can enhance the appeal of a property, potentially increasing its market value.
9. **Safety**: Being recessed, these lights reduce the risk of accidental contact or damage, making them a safer option in busy or high-traffic areas.
10. **Easy Installation and Maintenance**: They are relatively easy to install and maintain, with many models designed for quick bulb replacement and minimal upkeep.
How do you choose the right size and type of can light for a room?
To choose the right size and type of can light for a room, consider the following factors:
1. **Room Size and Ceiling Height**: Measure the room dimensions and ceiling height. Larger rooms or those with higher ceilings may require larger or more powerful can lights to ensure adequate illumination.
2. **Purpose and Functionality**: Determine the room's purpose. For task-oriented areas like kitchens or offices, opt for brighter, focused lighting. For ambient lighting in living rooms or bedrooms, softer, more diffused light is preferable.
3. **Light Size and Spacing**: Common can light sizes are 4, 5, and 6 inches. Smaller lights (4 inches) are suitable for accent lighting or smaller spaces, while larger lights (6 inches) are better for general lighting in larger areas. Space lights evenly, typically 4 to 6 feet apart, and ensure they are at least 2 to 3 feet away from walls to avoid shadows.
4. **Type of Bulb**: Choose between LED, incandescent, or halogen bulbs. LEDs are energy-efficient and long-lasting, making them a popular choice. Consider the bulb's color temperature (measured in Kelvin) to match the room's ambiance—warmer tones for cozy spaces and cooler tones for work areas.
5. **Trim Style**: Select a trim style that complements the room's decor. Options include baffle trims for reducing glare, reflector trims for maximizing light output, and adjustable trims for directing light.
6. **Dimming Capability**: If you desire adjustable lighting levels, ensure the can lights are compatible with dimmer switches.
7. **Installation Considerations**: Consider whether the lights will be installed in new construction or retrofitted into an existing ceiling. Choose the appropriate housing type (IC-rated for insulated ceilings or non-IC for non-insulated areas).
By evaluating these factors, you can select the right size and type of can light to enhance the room's functionality and aesthetic appeal.
What is the difference between can lights and downlights?
Can lights, also known as recessed lights, are lighting fixtures installed into a hollow opening in the ceiling. They are called "can" lights because the fixture is encased in a cylindrical metal housing, resembling a can. Can lights are versatile, providing a clean, unobtrusive look that blends seamlessly with the ceiling. They are often used for general lighting, task lighting, or accent lighting in various settings, including kitchens, living rooms, and hallways.
Downlights, on the other hand, refer to any lighting fixture that directs light downward. While all can lights are downlights, not all downlights are can lights. Downlights can be surface-mounted, pendant, or recessed. They are designed to focus light in a specific area, making them ideal for task lighting or highlighting particular features in a room. Downlights can vary in size, shape, and style, offering more design flexibility compared to traditional can lights.
The primary difference lies in their installation and design. Can lights are specifically recessed into the ceiling, providing a flush appearance, while downlights can be installed in various ways, including surface-mounted options. Additionally, can lights typically require more space above the ceiling for installation, whereas downlights can be more adaptable to different ceiling types and heights.
In summary, while can lights are a type of downlight with a specific recessed installation, downlights encompass a broader category of lighting fixtures that direct light downward, offering more versatility in design and application.
How do you install canless LED downlights?
1. **Turn Off Power**: Switch off the circuit breaker to the area where you’ll be installing the lights to ensure safety.
2. **Plan Layout**: Determine the number and placement of the downlights. Use a stud finder to avoid joists and mark the ceiling where each light will be installed.
3. **Cut Holes**: Use a hole saw or drywall saw to cut holes in the ceiling at the marked locations. Ensure the hole size matches the specifications of the LED downlight.
4. **Run Wiring**: If not already present, run electrical wiring from the power source to each hole. Use fish tape to pull wires through the ceiling. Ensure wiring complies with local electrical codes.
5. **Connect Wiring**: Strip the ends of the wires and connect them to the LED downlight’s junction box. Typically, this involves connecting black to black (hot), white to white (neutral), and green or bare copper to ground. Use wire nuts to secure connections.
6. **Install Downlights**: Insert the LED downlight into the hole. Most canless LED downlights have spring clips that hold them in place. Push the light up until the clips engage and the light is flush with the ceiling.
7. **Test Lights**: Turn the power back on at the circuit breaker and test the lights to ensure they are working properly.
8. **Finish Up**: If necessary, adjust the lights for alignment and ensure all connections are secure. Clean up any debris from the installation process.
9. **Safety Check**: Double-check all connections and ensure the lights are securely installed to prevent any hazards.
Can you retrofit existing can lights to LED?
Yes, you can retrofit existing can lights to LED. Retrofitting involves replacing the traditional incandescent or fluorescent bulbs in your can lights with LED alternatives. This process is relatively straightforward and can be done in a few steps:
1. **Turn Off Power**: Ensure the power to the light fixture is turned off at the circuit breaker to prevent any electrical hazards.
2. **Remove Existing Bulb**: Unscrew the existing bulb from the can light fixture. If there is a trim or cover, remove it as well.
3. **Choose the Right LED Retrofit Kit**: Select an LED retrofit kit that matches the size and type of your existing can light. These kits typically include an LED bulb and a trim that fits into the existing housing.
4. **Install the LED Retrofit Kit**:
- Connect the LED bulb to the existing socket. Some kits may require you to attach an adapter to the socket first.
- Secure the LED trim into the can light housing. This often involves using spring clips or other mechanisms provided with the kit.
5. **Restore Power and Test**: Turn the power back on at the circuit breaker and test the new LED light to ensure it is functioning correctly.
Retrofitting to LED offers several benefits, including energy efficiency, longer lifespan, and reduced heat output. Additionally, LED lights are available in various color temperatures and brightness levels, allowing for customization to suit your lighting needs.
What are the energy efficiency benefits of LED downlights?
LED downlights offer several energy efficiency benefits:
1. **Lower Energy Consumption**: LEDs use up to 80% less energy than traditional incandescent bulbs. This significant reduction in energy usage translates to lower electricity bills and reduced environmental impact.
2. **Long Lifespan**: LED downlights have a lifespan of up to 50,000 hours, far exceeding that of incandescent and fluorescent lights. This longevity reduces the frequency of replacements, leading to less waste and lower maintenance costs.
3. **High Luminous Efficacy**: LEDs convert a higher percentage of electricity into visible light, with efficacy rates often exceeding 100 lumens per watt. This means more light is produced per unit of energy consumed, enhancing overall efficiency.
4. **Directional Lighting**: Unlike traditional bulbs that emit light in all directions, LED downlights provide focused, directional lighting. This reduces wasted light and energy, as illumination is concentrated where it is needed most.
5. **Dimmability**: Many LED downlights are compatible with dimmer switches, allowing users to adjust brightness levels. This feature not only enhances ambiance but also conserves energy by reducing power consumption when full brightness is unnecessary.
6. **Reduced Heat Emission**: LEDs emit very little heat compared to incandescent bulbs, which release 90% of their energy as heat. This reduction in heat output decreases the load on air conditioning systems, further saving energy.
7. **Environmentally Friendly**: LEDs contain no hazardous materials like mercury, which is found in fluorescent lighting. Their energy efficiency and long life contribute to a smaller carbon footprint and less environmental pollution.
8. **Instant Lighting**: LEDs reach full brightness instantly without the warm-up time required by some other lighting technologies, ensuring immediate energy savings and convenience.
Overall, LED downlights provide a sustainable, cost-effective lighting solution with significant energy efficiency advantages.
How do you maintain and clean can lights and downlights?
To maintain and clean can lights and downlights, follow these steps:
1. **Safety First**: Turn off the power to the lights at the circuit breaker to prevent electrical shock. Allow the lights to cool down if they have been on.
2. **Remove the Trim and Bulb**: Gently remove the trim by pulling it down or unscrewing it, depending on the design. Carefully remove the bulb by unscrewing it counterclockwise.
3. **Clean the Trim**: Use a soft cloth or sponge with mild soap and water to clean the trim. Avoid abrasive cleaners that can damage the finish. Rinse and dry thoroughly before reinstallation.
4. **Clean the Bulb**: Wipe the bulb with a dry microfiber cloth to remove dust and fingerprints. Avoid using water or cleaning solutions on the bulb.
5. **Clean the Housing**: Use a vacuum with a brush attachment to remove dust and debris from the housing. For stubborn dirt, use a damp cloth, but ensure no moisture enters the electrical components.
6. **Inspect for Damage**: Check for any signs of wear or damage, such as frayed wires or cracked trims. Replace any damaged parts before reassembling.
7. **Reassemble**: Once everything is clean and dry, screw the bulb back into the socket. Reattach the trim by snapping or screwing it back into place.
8. **Test the Lights**: Restore power at the circuit breaker and test the lights to ensure they are functioning correctly.
9. **Regular Maintenance**: Schedule regular cleaning every 3-6 months to maintain optimal performance and appearance. Replace bulbs with energy-efficient options like LEDs to reduce heat and extend lifespan.
By following these steps, you can ensure your can lights and downlights remain clean, efficient, and safe.
