Pump Replacement Parts

Pump replacement parts help repair aging equipment and circulation systems. They help keep pumps working smoothly and maintain systems for long-term operation. Read Less

Frequently Asked Questions

What are the signs that a pump needs replacement parts?

Signs that a pump needs replacement parts include: 1. **Unusual Noises**: Grinding, whining, or screeching sounds may indicate worn bearings or other internal components. 2. **Reduced Performance**: A noticeable drop in flow rate or pressure suggests issues with the impeller, seals, or other critical parts. 3. **Leaks**: Visible fluid leaks around the pump housing or seals can signal worn or damaged seals or gaskets. 4. **Vibration**: Excessive vibration during operation may be due to misalignment, imbalance, or worn bearings. 5. **Overheating**: If the pump is running hotter than usual, it could be due to friction from worn parts or inadequate lubrication. 6. **Frequent Cycling**: A pump that turns on and off more frequently than normal might have issues with the pressure switch or internal components. 7. **Increased Energy Consumption**: A sudden rise in energy usage can indicate inefficiencies due to worn or failing parts. 8. **Corrosion or Rust**: Visible corrosion or rust on the pump or its components can weaken the structure and lead to failure. 9. **Air Leaks**: Air bubbles in the output or cavitation noises can suggest air leaks or issues with the suction line. 10. **Inconsistent Output**: Fluctuations in the pump’s output can be a sign of internal wear or blockages. 11. **Burnt Smell**: A burnt odor can indicate overheating or electrical issues within the pump motor. 12. **Age and Wear**: Older pumps or those with high operational hours may naturally require part replacements due to wear and tear. Regular maintenance and inspections can help identify these signs early, preventing more extensive damage and ensuring efficient pump operation.

How do I identify the correct replacement parts for my pump?

1. **Identify Pump Model and Manufacturer**: Locate the nameplate or label on your pump, which typically includes the model number, serial number, and manufacturer's name. This information is crucial for finding compatible parts. 2. **Consult the User Manual**: Refer to the pump's user manual or technical documentation. These resources often contain detailed parts lists and diagrams that can help you identify the specific components you need. 3. **Contact the Manufacturer or Supplier**: Reach out to the pump manufacturer or authorized distributor. They can provide guidance on the correct replacement parts and may offer direct sales or recommend authorized dealers. 4. **Use Online Resources**: Many manufacturers have online databases or parts catalogs where you can search for replacement parts using your pump's model number. Websites like Grainger, McMaster-Carr, or specific manufacturer sites can be useful. 5. **Check for Part Numbers**: If you have the old part, look for any part numbers or markings on it. These numbers can be cross-referenced with catalogs or online resources to find the correct replacement. 6. **Consider Compatibility**: Ensure that the replacement part is compatible with your pump model. This includes checking dimensions, materials, and specifications to match the original part. 7. **Seek Professional Assistance**: If you're unsure, consult with a professional technician or engineer who specializes in pumps. They can provide expert advice and ensure you select the right parts. 8. **Verify Warranty and Return Policies**: Before purchasing, check the warranty and return policies for the parts. This ensures you can return or exchange them if they are not suitable. 9. **Purchase from Reputable Sources**: Buy parts from reputable suppliers or directly from the manufacturer to ensure quality and authenticity.

Where can I buy replacement parts for my specific pump model?

To purchase replacement parts for your specific pump model, you can explore several options: 1. **Manufacturer's Website**: Visit the official website of the pump manufacturer. They often have a dedicated section for spare parts and accessories. You can search for your specific model and find the parts you need. 2. **Authorized Dealers**: Contact authorized dealers or distributors of the pump brand. They have access to genuine parts and can assist in ordering the correct components for your model. 3. **Local Retailers**: Check with local hardware or plumbing supply stores. They may stock parts for popular pump models or can order them for you. 4. **Online Retailers**: Websites like Amazon, eBay, or specialized online stores often carry a wide range of pump parts. Ensure you have the exact model number to find compatible parts. 5. **Industrial Supply Companies**: Companies like Grainger or McMaster-Carr offer a variety of industrial parts, including those for pumps. They provide detailed catalogs and customer support to help you find the right parts. 6. **Repair Shops**: Contact local pump repair shops. They might have spare parts in stock or can order them for you. They can also provide installation services if needed. 7. **Forums and Online Communities**: Join forums or online communities related to pumps or your specific brand. Members often share resources and recommendations for purchasing parts. 8. **Second-hand Market**: For older or discontinued models, consider checking second-hand markets or salvage yards for parts. Always ensure that the parts you purchase are compatible with your pump model to avoid any operational issues.

How often should pump parts be replaced to ensure optimal performance?

Pump parts should be replaced based on a combination of manufacturer recommendations, usage conditions, and regular maintenance inspections. Generally, the following guidelines can be considered: 1. **Manufacturer's Guidelines**: Always refer to the pump manufacturer's manual for specific replacement intervals. These guidelines are based on extensive testing and provide a baseline for maintenance schedules. 2. **Usage Conditions**: The operating environment significantly impacts the wear and tear of pump parts. Pumps operating in harsh conditions, such as those handling abrasive or corrosive fluids, may require more frequent part replacements compared to those in less demanding environments. 3. **Regular Inspections**: Conduct regular inspections to identify signs of wear, corrosion, or damage. Key components to monitor include seals, bearings, impellers, and shafts. Any signs of deterioration should prompt immediate replacement to prevent further damage and ensure efficiency. 4. **Operating Hours**: For pumps running continuously, parts may need replacement more frequently. A common practice is to replace critical components like seals and bearings every 6,000 to 8,000 operating hours, but this can vary based on specific pump models and conditions. 5. **Performance Monitoring**: Implement a performance monitoring system to track efficiency and output. A decline in performance can indicate the need for part replacement. Vibration analysis, pressure monitoring, and flow rate assessments are useful tools in this regard. 6. **Preventive Maintenance**: Establish a preventive maintenance schedule that includes regular part replacements before failure occurs. This proactive approach minimizes downtime and extends the overall lifespan of the pump. By adhering to these guidelines, you can ensure optimal pump performance and reduce the risk of unexpected failures.

What tools are needed to replace pump parts?

To replace pump parts, you typically need the following tools: 1. **Wrenches**: Adjustable wrenches, socket wrenches, and open-end wrenches are essential for loosening and tightening nuts and bolts. 2. **Screwdrivers**: Both flathead and Phillips screwdrivers are necessary for removing screws that secure pump components. 3. **Pliers**: Needle-nose and slip-joint pliers help in gripping, twisting, and pulling small parts or wires. 4. **Pipe Wrench**: Useful for gripping and turning pipes or cylindrical pump parts. 5. **Allen Wrenches (Hex Keys)**: Required for pumps with hexagonal socket screws. 6. **Hammer and Mallet**: A rubber mallet is useful for gently tapping parts into place without causing damage, while a hammer may be needed for more forceful adjustments. 7. **Torque Wrench**: Ensures that bolts and nuts are tightened to the manufacturer's specifications to avoid over-tightening or under-tightening. 8. **Bearing Puller**: Necessary for removing bearings from shafts without causing damage. 9. **Seal Puller**: Used to remove seals without damaging the surrounding components. 10. **Gasket Scraper**: Helps in removing old gasket material from surfaces to ensure a proper seal with new gaskets. 11. **Lubricants and Sealants**: Essential for ensuring smooth operation and proper sealing of parts. 12. **Multimeter**: For electrical pumps, a multimeter is useful for checking electrical connections and components. 13. **Safety Gear**: Gloves, goggles, and protective clothing to ensure safety during the replacement process. 14. **Manual or Service Guide**: The pump's manual or service guide provides specific instructions and specifications for part replacement. These tools help ensure that pump parts are replaced efficiently and correctly, minimizing downtime and maintaining pump performance.

Can I replace pump parts myself, or should I hire a professional?

Whether you can replace pump parts yourself or should hire a professional depends on several factors: 1. **Complexity of the Pump**: Simple pumps, like those used in small household applications, may have parts that are easy to replace with basic tools and instructions. More complex pumps, such as those used in industrial settings, often require specialized knowledge and tools. 2. **Your Skill Level**: If you have experience with mechanical repairs and understand the workings of the pump, you might be able to handle the replacement yourself. However, if you lack experience, it might be safer to hire a professional to avoid causing further damage. 3. **Availability of Parts and Tools**: Ensure you have access to the correct replacement parts and the necessary tools. Some parts may be proprietary or require specific tools for installation. 4. **Warranty Considerations**: Check if the pump is still under warranty. DIY repairs might void the warranty, whereas professional repairs might be covered. 5. **Safety Concerns**: Pumps, especially those dealing with high pressure or hazardous materials, can pose safety risks. If there are significant safety concerns, it is advisable to hire a professional. 6. **Cost and Time**: Consider the cost of hiring a professional versus doing it yourself. Also, factor in the time it will take you to complete the repair compared to a professional. 7. **Regulatory Requirements**: In some cases, local regulations may require that certain types of pump repairs be performed by licensed professionals. In summary, if the pump is simple, you have the necessary skills and tools, and there are no warranty or safety concerns, you might replace the parts yourself. Otherwise, hiring a professional is the safer and more reliable option.
What are the most common pump parts that need replacement?

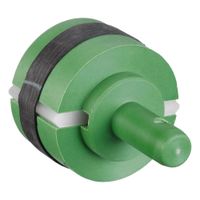
The most common pump parts that require replacement include: 1. **Seals and Gaskets**: These components are crucial for preventing leaks and maintaining pressure. Over time, they can wear out due to friction, temperature changes, and chemical exposure, necessitating regular replacement. 2. **Bearings**: Bearings support the pump shaft and reduce friction between moving parts. They can wear out due to continuous operation, misalignment, or contamination, leading to increased vibration and noise. 3. **Impellers**: Impellers are responsible for moving the fluid through the pump. They can suffer from erosion, corrosion, or cavitation, which can reduce efficiency and require replacement. 4. **Shafts**: The pump shaft transmits power from the motor to the impeller. It can become misaligned or damaged due to excessive vibration or mechanical stress, leading to the need for replacement. 5. **O-rings**: These are used to create a tight seal between different pump components. They can degrade over time due to chemical exposure or temperature fluctuations. 6. **Wear Rings**: These rings help maintain the clearance between the impeller and the pump casing. They can wear down due to friction and need replacement to prevent efficiency loss. 7. **Couplings**: Couplings connect the pump to the motor. They can wear out or become misaligned, leading to vibration and noise issues. 8. **Valves**: Valves control the flow of fluid within the pump. They can become clogged or damaged, affecting pump performance. 9. **Diaphragms**: In diaphragm pumps, these components can wear out due to constant flexing and exposure to harsh chemicals. 10. **Bushings**: These provide support and reduce friction for rotating parts. They can wear out over time, leading to increased vibration and noise. Regular maintenance and inspection can help identify these issues early, ensuring efficient pump operation and reducing downtime.

How do I troubleshoot a pump before deciding to replace parts?

1. **Visual Inspection**: Check for obvious signs of damage, leaks, or wear. Ensure all connections are secure and there are no visible cracks or corrosion. 2. **Power Supply**: Verify that the pump is receiving power. Check the circuit breaker, fuses, and ensure the power switch is on. Use a multimeter to confirm voltage at the pump terminals. 3. **Noise and Vibration**: Listen for unusual noises or excessive vibration, which can indicate mechanical issues. Ensure the pump is properly mounted and aligned. 4. **Flow Rate and Pressure**: Measure the flow rate and pressure to ensure they meet specifications. Low flow or pressure can indicate blockages, air leaks, or impeller issues. 5. **Check for Blockages**: Inspect the inlet and outlet for obstructions. Clean any filters or strainers that may be clogged. 6. **Seal and Gasket Inspection**: Examine seals and gaskets for wear or damage, which can cause leaks and reduce efficiency. 7. **Impeller and Bearings**: Inspect the impeller for damage or wear. Check bearings for smooth operation and listen for grinding noises, which indicate wear. 8. **Temperature**: Ensure the pump is not overheating. Check for adequate cooling and proper lubrication. 9. **Air Leaks**: Check for air leaks in suction lines, which can cause cavitation and reduce performance. 10. **Pump Curve**: Compare the pump’s performance to its pump curve to identify deviations that may indicate internal issues. 11. **Maintenance Records**: Review maintenance logs for any recurring issues or patterns that could indicate underlying problems. 12. **Consult Manual**: Refer to the pump’s manual for specific troubleshooting steps and guidelines. 13. **Professional Assessment**: If issues persist, consider consulting a professional technician for a detailed assessment before replacing parts.

Are there universal replacement parts for pumps, or do they vary by brand?

Pump replacement parts are not universally standardized and typically vary by brand and model. Each pump manufacturer designs their products with specific components that fit their unique specifications, which means that parts such as seals, impellers, bearings, and gaskets are often proprietary. This ensures optimal performance and compatibility with the pump's design. While some generic parts may be available, they may not provide the same level of performance or durability as original equipment manufacturer (OEM) parts. Using non-OEM parts can sometimes void warranties or lead to suboptimal performance, as they may not meet the precise engineering standards required for the specific pump model. In some cases, certain components like seals or bearings might be available in standard sizes that can fit multiple brands, but this is more the exception than the rule. It's crucial to consult the pump's manual or contact the manufacturer to ensure compatibility when replacing parts. For industries that rely heavily on pumps, maintaining a stock of OEM parts or establishing a relationship with a reliable supplier can be beneficial to minimize downtime and ensure the longevity of the equipment.

How can I extend the lifespan of my pump with regular maintenance?

To extend the lifespan of your pump, regular maintenance is crucial. Start by following the manufacturer's maintenance schedule and guidelines. Regularly inspect the pump for any signs of wear, corrosion, or damage. Check seals and gaskets for leaks and replace them if necessary. Ensure that the pump is properly lubricated; use the recommended type and amount of lubricant to prevent friction and overheating. Monitor the pump's performance by keeping an eye on pressure, flow rates, and temperature. Any deviations from normal operating conditions can indicate potential issues. Clean the pump and its components regularly to prevent the buildup of debris and contaminants that can cause blockages or damage. Check the alignment of the pump and its motor to prevent undue stress on the components. Misalignment can lead to increased vibration and wear. Tighten any loose bolts or connections to ensure stability during operation. Inspect the electrical components, such as wiring and connections, for signs of wear or damage. Ensure that the pump is operating within its specified voltage and current limits to prevent electrical overloads. Replace worn or damaged parts promptly to prevent further damage to the pump. Keep a record of all maintenance activities, including inspections, repairs, and replacements, to track the pump's condition over time. Finally, train personnel on proper pump operation and maintenance procedures to ensure consistent care. By implementing these practices, you can significantly extend the lifespan of your pump, reduce downtime, and improve overall efficiency.