Vehicle Lifting & Support Equipment

Equipment to lift and support vehicles includes vehicle lifting jacks, support stands, lifting cranes and slings, loading and repair ramps, and outrigger pads and cribbing blocks. Lifting jacks raise vehicles off the garage floor so that maintenance can be performed. Stands support the weight of veh .....Read More

Frequently Asked Questions

What are the different types of vehicle lifting equipment?

Vehicle lifting equipment is essential in automotive repair and maintenance. Here are the different types: 1. **Two-Post Lifts**: Common in garages, these lifts have two arms that support the vehicle from the sides. They are ideal for general repairs and maintenance. 2. **Four-Post Lifts**: These lifts provide stability with four posts and are often used for wheel alignment and long-term vehicle storage. They can handle heavier vehicles. 3. **Scissor Lifts**: Named for their scissor-like mechanism, these lifts are compact and suitable for low-ceiling garages. They are versatile and can be portable or fixed. 4. **In-Ground Lifts**: Installed below the garage floor, these lifts save space and provide a clean look. They are often used in professional settings for their durability and capacity. 5. **Portable Car Lifts**: Lightweight and mobile, these lifts are ideal for small garages or mobile mechanics. They are easy to set up and store. 6. **Alignment Lifts**: Specifically designed for wheel alignment, these lifts have features like turn plates and slip plates to facilitate precise adjustments. 7. **Mobile Column Lifts**: These are individual columns that can be positioned around a vehicle, offering flexibility and the ability to lift heavy-duty vehicles like buses and trucks. 8. **Parallelogram Lifts**: These lifts have a parallelogram design and are used for large vehicles. They provide a clear workspace underneath the vehicle. 9. **Low/Mid-Rise Lifts**: Suitable for tire and brake work, these lifts raise vehicles to a lower height compared to full-rise lifts, making them ideal for quick service tasks. 10. **Motorcycle Lifts**: Designed specifically for motorcycles, these lifts provide a stable platform for maintenance and repairs. Each type of lift serves specific needs, from general maintenance to specialized tasks, and is chosen based on the vehicle type, garage space, and specific requirements.

How do I choose the right vehicle jack for my car?

To choose the right vehicle jack for your car, consider the following factors: 1. **Vehicle Weight and Type**: Check your car's weight and type (sedan, SUV, truck) in the owner's manual. Ensure the jack's weight capacity exceeds your vehicle's weight. For heavier vehicles like trucks or SUVs, a high-capacity jack is necessary. 2. **Jack Type**: - **Scissor Jacks**: Compact and often included with cars for emergency tire changes. Suitable for small to medium cars. - **Floor Jacks**: Offer stability and ease of use, ideal for garages. Suitable for most vehicles, especially if you perform regular maintenance. - **Bottle Jacks**: Portable and powerful, suitable for heavier vehicles but require more clearance. - **Hi-Lift Jacks**: Designed for off-road vehicles with high ground clearance. 3. **Lift Height**: Ensure the jack can lift your vehicle high enough to change a tire or perform maintenance. Check the maximum lift height against your vehicle's clearance needs. 4. **Build Quality and Material**: Opt for jacks made from durable materials like steel or aluminum. Aluminum jacks are lighter and easier to maneuver. 5. **Portability and Storage**: Consider the jack's weight and size if you need to transport it. Scissor jacks are more portable, while floor jacks are bulkier. 6. **Safety Features**: Look for jacks with safety features like a wide base for stability, safety valves to prevent overloading, and locking mechanisms. 7. **Budget**: Balance cost with quality and features. Investing in a reliable jack ensures safety and longevity. 8. **Brand Reputation and Reviews**: Research brands and read customer reviews to ensure reliability and performance. By considering these factors, you can select a vehicle jack that meets your car's requirements and your personal needs.

What safety precautions should I take when using vehicle support stands?

1. **Select the Right Stands**: Use stands that are rated for the weight of your vehicle. Check the weight capacity and ensure it exceeds the vehicle's weight. 2. **Inspect Stands**: Before use, inspect the stands for any damage, cracks, or rust. Ensure the locking mechanisms are functioning properly. 3. **Level Surface**: Always use stands on a flat, stable surface. Avoid using them on sloped or uneven ground to prevent tipping. 4. **Secure the Vehicle**: Before lifting, ensure the vehicle is in park (or in gear for manual transmissions) and the parking brake is engaged. Use wheel chocks on the opposite end of the vehicle to prevent rolling. 5. **Proper Lifting**: Use a quality hydraulic jack to lift the vehicle. Refer to the vehicle’s manual for the correct jacking points to avoid damage. 6. **Position Stands Correctly**: Place the stands under the vehicle at the recommended support points. Ensure they are positioned symmetrically and are directly under the vehicle's frame or designated lift points. 7. **Lower Vehicle onto Stands**: Slowly lower the vehicle onto the stands, ensuring it is stable and secure. Double-check that the stands are properly engaged and locked. 8. **Test Stability**: Gently push the vehicle to ensure it is stable on the stands. If there is any movement, reposition the stands and test again. 9. **Avoid Overloading**: Never exceed the weight limit of the stands. Do not use them for purposes other than supporting the vehicle. 10. **Stay Clear**: Once the vehicle is on the stands, avoid placing any part of your body under the vehicle unless absolutely necessary and ensure it is stable. 11. **Emergency Preparedness**: Keep a phone nearby in case of emergencies and ensure someone knows you are working under the vehicle.

How do I properly use a vehicle lifting crane and sling?

To properly use a vehicle lifting crane and sling, follow these steps: 1. **Inspection**: Before use, inspect the crane and sling for any signs of wear, damage, or defects. Ensure all components are in good working condition. 2. **Capacity Check**: Verify the lifting capacity of the crane and sling. Ensure they are suitable for the weight of the vehicle you intend to lift. 3. **Positioning**: Position the crane on a stable, level surface. Engage any stabilizers or outriggers to prevent tipping. 4. **Sling Selection**: Choose the appropriate sling type and size for the vehicle. Ensure the sling is rated for the vehicle's weight and is free from cuts, frays, or other damage. 5. **Attachment Points**: Identify the vehicle's designated lifting points, usually specified in the vehicle's manual. Avoid using non-recommended points to prevent damage. 6. **Sling Attachment**: Securely attach the sling to the vehicle's lifting points. Ensure the sling is evenly distributed and not twisted. 7. **Crane Hooking**: Attach the sling to the crane's hook. Ensure the hook's safety latch is engaged to prevent accidental detachment. 8. **Test Lift**: Perform a test lift by raising the vehicle slightly off the ground. Check for stability and ensure the load is balanced. 9. **Lifting**: Gradually lift the vehicle to the desired height. Avoid sudden movements and ensure the load remains stable. 10. **Monitoring**: Continuously monitor the lifting process. Be alert for any signs of instability or unusual noises. 11. **Lowering**: When lowering the vehicle, do so slowly and steadily. Ensure the area is clear of obstructions and personnel. 12. **Post-Use Inspection**: After use, inspect the crane and sling for any damage incurred during the operation. Store them properly to prevent future damage.

What are the benefits of using outrigger pads and cribbing blocks?

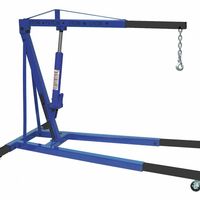
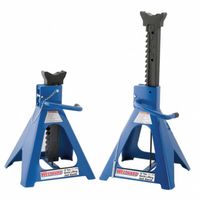
Outrigger pads and cribbing blocks are essential tools in stabilizing heavy equipment, such as cranes and aerial lifts, during operation. Their benefits include: 1. **Enhanced Stability**: Outrigger pads distribute the weight of the equipment over a larger surface area, reducing ground pressure and preventing the equipment from sinking into soft or uneven terrain. This ensures a stable base, minimizing the risk of tipping. 2. **Safety Improvement**: By providing a stable platform, these tools significantly reduce the likelihood of accidents caused by equipment instability. This is crucial in maintaining a safe working environment for operators and nearby workers. 3. **Versatility**: Both outrigger pads and cribbing blocks can be used on various ground conditions, including mud, sand, gravel, and asphalt. This adaptability makes them suitable for diverse job sites. 
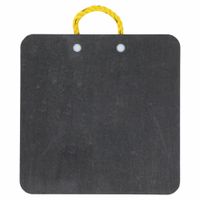
4. **Load Distribution**: Cribbing blocks help in evenly distributing the load, especially when stacking is required to achieve the desired height. This prevents point loading and potential damage to the ground or equipment. 5. **Durability and Longevity**: Made from high-density polyethylene or other robust materials, these tools are resistant to weather, chemicals, and wear, ensuring long-term use and reducing replacement costs. 6. **Portability and Ease of Use**: Lightweight and easy to handle, outrigger pads and cribbing blocks can be quickly deployed and repositioned, saving time and labor on site. 7. **Cost-Effectiveness**: By preventing equipment damage and reducing the risk of accidents, these tools can lead to significant cost savings in terms of repairs, insurance, and downtime. 8. **Compliance with Regulations**: Using these tools helps in adhering to safety regulations and standards, which is essential for legal compliance and avoiding potential fines. Overall, outrigger pads and cribbing blocks are vital for ensuring operational safety, efficiency, and cost-effectiveness in heavy equipment operations.

How do I safely load a vehicle onto repair ramps?

1. **Choose the Right Ramps**: Ensure the ramps are suitable for your vehicle's weight and size. Check the manufacturer's specifications. 2. **Inspect the Ramps**: Before use, inspect the ramps for any damage or wear. Ensure they are clean and free of oil or debris. 3. **Position the Ramps**: Place the ramps on a flat, stable surface. Align them with the vehicle's front wheels, ensuring they are parallel and evenly spaced. 4. **Secure the Ramps**: If possible, use a non-slip mat or surface under the ramps to prevent them from sliding. Some ramps come with rubber feet or textured surfaces for added grip. 5. **Prepare the Vehicle**: Ensure the vehicle is in park (automatic) or in gear (manual) with the parking brake engaged. Turn off the engine. 6. **Align the Vehicle**: Carefully drive the vehicle forward, aligning the wheels with the ramps. Use a spotter if available to guide you. 7. **Drive Up Slowly**: Gently accelerate and drive up the ramps at a slow, steady pace. Avoid sudden movements or jerks. 8. **Stop at the Top**: Once the vehicle is fully on the ramps, stop and engage the parking brake. Turn off the engine. 9. **Chock the Wheels**: Place wheel chocks behind the rear wheels to prevent any backward movement. 10. **Check Stability**: Ensure the vehicle is stable and securely positioned on the ramps before performing any work. 11. **Safety Precautions**: Always wear appropriate safety gear and follow all safety guidelines when working under the vehicle. 12. **Removal**: When finished, remove the wheel chocks, start the vehicle, and slowly reverse down the ramps, maintaining control and alignment.

Where can I find replacement parts for my vehicle lifting equipment?

You can find replacement parts for your vehicle lifting equipment from several sources: 1. **Manufacturer's Website**: Check the official website of the manufacturer of your lifting equipment. They often have a section for spare parts or a customer service contact to assist with parts orders. 2. **Authorized Dealers**: Contact authorized dealers or distributors of the brand. They have access to genuine parts and can provide guidance on the correct parts for your specific model. 3. **Online Retailers**: Websites like Amazon, eBay, or specialized automotive equipment retailers often stock a wide range of parts. Ensure the parts are compatible with your equipment by checking model numbers and specifications. 4. **Local Equipment Suppliers**: Visit local automotive equipment suppliers or repair shops. They may have parts in stock or can order them for you. 5. **Industrial Supply Stores**: Stores like Grainger or Northern Tool & Equipment may carry parts for various lifting equipment brands. 6. **Salvage Yards**: For older or discontinued models, salvage yards can be a valuable resource for finding used parts. 7. **Forums and Online Communities**: Join forums or online communities related to automotive repair and equipment. Members often share resources and may know where to find specific parts. 8. **Trade Shows and Expos**: Attend industry trade shows or expos where manufacturers and suppliers showcase their products. This can be a good opportunity to network and find parts suppliers. 9. **Professional Repair Services**: Some repair services specialize in vehicle lifting equipment and can source parts as part of their service. Always verify the authenticity and compatibility of parts before purchasing to ensure safety and proper functioning of your equipment.