Call +(254) 703 030 000 / 751 483 999 / 721 704 777
Vehicle A/C & Radiator Maintenance
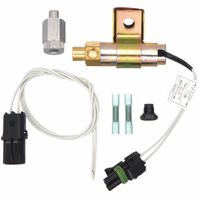
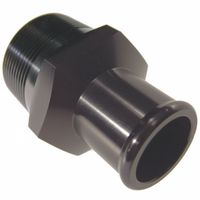
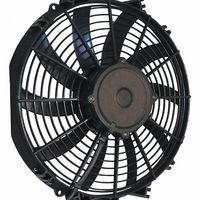
Vehicle A/C and radiator maintenance requires specialized tools to keep these systems running effectively. Vehicle water pumps circulate coolant between a vehicle's engine and radiator to prevent overheating, and hose adapters assist with replacing water pumps. Vehicle cooling fans keep engines cool .....Read More
Frequently Asked Questions
What are the signs of a failing vehicle A/C system?
Signs of a failing vehicle A/C system include:
1. **Weak Airflow**: Reduced airflow from the vents can indicate a failing blower motor, clogged air filters, or blocked evaporator core.
2. **Warm Air**: If the A/C blows warm air, it may be due to low refrigerant levels, a malfunctioning compressor, or a faulty condenser.
3. **Unusual Noises**: Grinding, squealing, or rattling noises when the A/C is on can suggest issues with the compressor, fan, or belt.
4. **Foul Odors**: Musty or moldy smells indicate mold or mildew growth in the evaporator case or a clogged cabin air filter.
5. **Water Stains or Leaks**: Water pooling inside the vehicle or under the dashboard can be due to a blocked drain tube or evaporator case.
6. **Compressor Clutch Issues**: If the compressor clutch doesn’t engage, it may be due to electrical issues, a faulty clutch, or low refrigerant.
7. **Refrigerant Leaks**: Oily residue around A/C components or a noticeable drop in cooling efficiency can indicate a refrigerant leak.
8. **Erratic Cooling**: Inconsistent cooling performance can be caused by a failing compressor, faulty thermostat, or electrical issues.
9. **High Cabin Humidity**: If the A/C fails to dehumidify the air, it may be due to a malfunctioning evaporator or low refrigerant.
10. **Dashboard Warning Lights**: Some vehicles have A/C system warning lights that indicate a problem.
11. **Increased Fuel Consumption**: A failing A/C system can cause the engine to work harder, leading to higher fuel consumption.
12. **Visible Damage**: Cracks, corrosion, or damage to A/C components like hoses, belts, or the condenser can indicate potential failure.
Regular maintenance and prompt attention to these signs can prevent further damage and ensure the A/C system functions efficiently.
How often should I service my vehicle's radiator?
You should service your vehicle's radiator every 24,000 to 36,000 miles or every 2 to 3 years, whichever comes first. However, this can vary based on the vehicle's make, model, and driving conditions. Regular maintenance includes checking for leaks, inspecting hoses and connections, and ensuring the coolant is at the proper level and concentration. It's also important to flush the radiator system periodically to remove any debris or buildup that can impede performance. Always refer to your vehicle's owner manual for specific recommendations, as some newer models may have extended service intervals.
What tools are needed to replace a vehicle water pump?
To replace a vehicle water pump, you will need the following tools:
1. **Socket Set**: A comprehensive set of sockets, including deep sockets, is essential for removing bolts and nuts of various sizes.
2. **Wrench Set**: Combination wrenches or ratcheting wrenches are useful for accessing tight spaces.
3. **Screwdrivers**: Both flathead and Phillips screwdrivers are needed for removing clamps and other fasteners.
4. **Pliers**: Needle-nose and regular pliers are useful for removing hose clamps and other small components.
5. **Torque Wrench**: Ensures that bolts are tightened to the manufacturer's specifications to prevent leaks or damage.
6. **Drain Pan**: Used to catch the coolant when draining the radiator and water pump.
7. **Gasket Scraper**: Removes old gasket material from the engine block and water pump mounting surface.
8. **Pry Bar**: Helps in loosening the water pump if it is stuck due to corrosion or old gasket material.
9. **Coolant Funnel**: Assists in refilling the cooling system without spills.
10. **Hose Clamp Pliers**: Specialized pliers for removing and installing hose clamps easily.
11. **Belt Tensioner Tool**: Required for loosening and tightening the serpentine belt if the water pump is driven by it.
12. **Jack and Jack Stands**: If necessary, to lift the vehicle for better access to the water pump.
13. **Shop Towels/Rags**: For cleaning up spills and wiping down surfaces.
14. **Safety Gear**: Gloves and safety glasses to protect against coolant and debris.
15. **Service Manual**: Provides specific instructions and torque specifications for your vehicle model.
These tools will help ensure a smooth and efficient water pump replacement process.
How do I know if my vehicle cooling fan is working properly?
To determine if your vehicle's cooling fan is functioning properly, follow these steps:
1. **Visual Inspection**: Open the hood and visually inspect the fan for any visible damage, such as cracks or broken blades. Ensure the fan is securely mounted and there are no obstructions.
2. **Listen for Noise**: Start the engine and let it idle. Listen for unusual noises such as grinding or squealing, which may indicate a problem with the fan motor or bearings.
3. **Temperature Monitoring**: Keep an eye on the temperature gauge on your dashboard. The cooling fan should activate when the engine reaches a certain temperature, typically between 200-230°F (93-110°C). If the temperature continues to rise without the fan turning on, there may be an issue.
4. **Fan Activation**: With the engine running and the air conditioning turned on, the fan should engage automatically. If it doesn't, there may be a problem with the fan relay, fuse, or motor.
5. **Check Electrical Connections**: Inspect the electrical connections to the fan for corrosion or loose wires. Ensure the fan relay and fuse are in good condition and replace them if necessary.
6. **Manual Testing**: If accessible, you can test the fan by directly connecting it to the battery using jumper wires. If the fan operates, the issue may lie in the relay, fuse, or wiring.
7. **Diagnostic Tools**: Use an OBD-II scanner to check for any error codes related to the cooling system, which can help identify specific issues with the fan or its components.
8. **Professional Inspection**: If you're unable to diagnose the problem, consult a professional mechanic for a thorough inspection and repair.
Regular maintenance and checks can prevent cooling fan issues and ensure your vehicle operates efficiently.
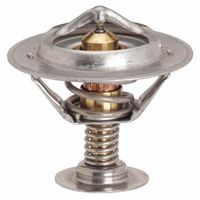
What are the symptoms of a bad vehicle thermostat?
A malfunctioning vehicle thermostat can lead to several noticeable symptoms:
1. **Engine Overheating**: A stuck-closed thermostat prevents coolant from circulating, causing the engine to overheat. This is often indicated by a rising temperature gauge or warning light on the dashboard.
2. **Erratic Temperature Fluctuations**: If the thermostat opens and closes inconsistently, the engine temperature may fluctuate unpredictably, causing the temperature gauge to move erratically.
3. **Poor Heater Performance**: A thermostat stuck open can cause the engine to run cooler than normal, leading to insufficient heat being produced for the vehicle’s cabin heater.
4. **Coolant Leaks**: A faulty thermostat can cause pressure build-up in the cooling system, leading to leaks around the thermostat housing or other parts of the cooling system.
5. **Increased Fuel Consumption**: An engine running too cold due to a stuck-open thermostat may consume more fuel, as it operates less efficiently outside its optimal temperature range.
6. **Check Engine Light**: Modern vehicles may trigger a check engine light if the engine does not reach its operating temperature within a specified time, often due to a thermostat issue.
7. **Unusual Noises**: Gurgling or knocking sounds from the engine bay can indicate coolant flow issues related to a malfunctioning thermostat.
8. **Visible Coolant Flow Issues**: When the engine is warm, removing the radiator cap (only when safe) may reveal little to no coolant movement, suggesting a thermostat problem.
Addressing these symptoms promptly is crucial to prevent engine damage and maintain vehicle performance.
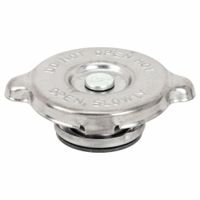
How do I check if my radiator cap is functioning correctly?
1. **Visual Inspection**: Check the radiator cap for any visible signs of damage, such as cracks, corrosion, or worn-out rubber seals. A damaged cap can lead to pressure loss.
2. **Pressure Test**: Use a radiator cap tester to check the cap's ability to hold pressure. Attach the cap to the tester, pump it to the specified pressure rating (usually marked on the cap), and see if it maintains the pressure. If it doesn't, the cap may be faulty.
3. **Seal Check**: Inspect the rubber gasket or seal under the cap. It should be flexible and intact. A brittle or cracked seal can cause leaks.
4. **Spring Tension**: Press down on the cap's spring mechanism. It should offer resistance and return to its original position. A weak spring can fail to maintain proper pressure.
5. **Coolant Leaks**: Look for signs of coolant leakage around the cap or on the engine. Leaks can indicate a faulty seal or cap.
6. **Overheating Symptoms**: If your engine frequently overheats, it might be due to a malfunctioning cap that fails to maintain the correct pressure, leading to coolant boiling over.
7. **Coolant Level**: Check the coolant level in the radiator and overflow tank. A consistently low level might suggest a pressure issue caused by a faulty cap.
8. **Temperature Fluctuations**: Monitor the engine temperature gauge. Erratic temperature changes can be a sign of pressure loss due to a bad cap.
9. **Professional Inspection**: If unsure, have a mechanic inspect the cap and cooling system for a comprehensive assessment.
What causes an air conditioning clutch to fail?
An air conditioning (AC) clutch can fail due to several reasons:
1. **Wear and Tear**: Over time, the AC clutch can wear out due to constant engagement and disengagement, leading to mechanical failure.
2. **Electrical Issues**: The clutch relies on an electromagnetic coil to engage. If there is a failure in the electrical system, such as a blown fuse, faulty relay, or damaged wiring, the clutch may not engage properly.
3. **Overheating**: Excessive heat can damage the clutch. This can be caused by a lack of refrigerant, which leads to the compressor working harder and generating more heat, or by a malfunctioning cooling fan.
4. **Bearing Failure**: The clutch has a bearing that allows it to spin freely. If this bearing fails, it can cause the clutch to seize or make noise, leading to failure.
5. **Contamination**: Dirt, debris, or oil can contaminate the clutch surfaces, reducing friction and preventing proper engagement.
6. **Misalignment**: If the clutch is not properly aligned with the compressor pulley, it can cause uneven wear and eventual failure.
7. **Excessive Load**: If the AC system is overcharged with refrigerant or if there is a blockage, it can put extra strain on the clutch, leading to premature failure.
8. **Improper Installation**: Incorrect installation of the clutch or related components can lead to operational issues and failure.
9. **Component Failure**: Failure of other AC system components, such as the compressor, can indirectly cause the clutch to fail.
Regular maintenance and timely repairs can help prevent these issues and extend the life of the AC clutch.