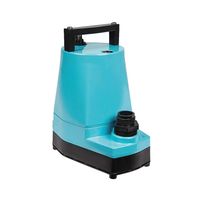
Sump, Sewage & Utility Pumps

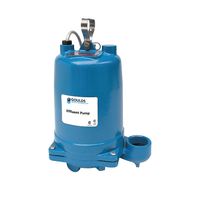
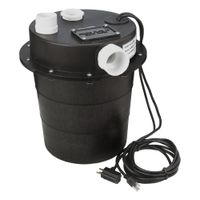
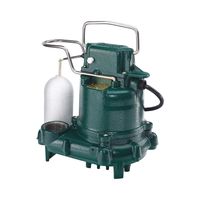
Sump, sewage, and utility pumps drain liquids from flooded areas and basin sump pits to prevent flooding. Primary sump pumps drain water from sump pits in basements to prevent damage to homes and belongings. Sewage and effluent pumps dispose of wastewater from drains or septic systems. Marine bilge .....Read More

Frequently Asked Questions

What is the difference between a sump pump and a sewage pump?

A sump pump and a sewage pump serve different purposes and are used in distinct applications, primarily related to water and waste management in residential and commercial settings. A sump pump is designed to remove accumulated water from a sump basin, typically found in the basement of homes. Its primary function is to prevent flooding and manage water intrusion by pumping out groundwater that collects in the basin, directing it away from the building to a designated drainage area. Sump pumps are crucial in areas prone to heavy rainfall or high water tables. They handle clear or slightly dirty water but are not equipped to manage solid waste or sewage. In contrast, a sewage pump is specifically engineered to move both liquids and solid waste from a sewage basin to a septic tank or a sewer system. These pumps are essential in situations where the sewage line is located at a higher elevation than the plumbing fixtures, requiring the waste to be pumped upward. Sewage pumps are robust, capable of handling solids up to 2 inches in diameter, and are often used in residential and commercial properties with basement bathrooms or laundry rooms. Key differences include: 1. **Purpose**: Sump pumps manage water intrusion; sewage pumps handle waste and sewage. 2. **Capacity**: Sump pumps handle clear water; sewage pumps manage solids and liquids. 3. **Design**: Sump pumps are less robust; sewage pumps are built to handle solid waste. 4. **Installation**: Sump pumps are installed in sump basins; sewage pumps are installed in sewage basins. In summary, while both pumps are vital for preventing water damage and managing waste, their applications, design, and capabilities differ significantly based on the type of material they are intended to handle.

How do I choose the right size sump pump for my basement?

To choose the right size sump pump for your basement, consider the following factors: 1. **Basement Size and Water Volume**: Measure the area of your basement and estimate the volume of water that typically accumulates. Larger basements or those with significant water issues may require more powerful pumps. 2. **Pump Capacity**: Sump pumps are rated by horsepower (HP) and gallons per hour (GPH). A 1/3 HP pump is usually sufficient for average homes with moderate water issues, handling about 2,000-3,000 GPH. For larger basements or severe flooding, consider a 1/2 HP or 3/4 HP pump, which can handle 3,000-5,000 GPH. 3. **Head Pressure**: This is the vertical distance the pump must move water. Calculate the height from the sump pit to the discharge point. Ensure the pump's head capacity exceeds this height to maintain efficiency. 4. **Pump Type**: Choose between submersible and pedestal pumps. Submersible pumps are quieter and more efficient for larger volumes, while pedestal pumps are easier to maintain and suitable for smaller volumes. 5. **Power Source**: Consider a pump with a battery backup or water-powered backup to ensure operation during power outages. 6. **Switch Type**: Opt for a reliable switch mechanism, such as vertical or tethered float switches, to prevent pump failure. 7. **Material and Durability**: Look for pumps made from corrosion-resistant materials like stainless steel or cast iron for longevity. 8. **Installation and Maintenance**: Ensure the pump is easy to install and maintain. Check for features like a removable intake screen for easy cleaning. 9. **Warranty and Brand Reputation**: Choose a pump with a good warranty and from a reputable brand to ensure reliability and support. By considering these factors, you can select a sump pump that effectively manages your basement's water issues.

How often should a sump pump be serviced or replaced?

A sump pump should be serviced at least once a year to ensure it is functioning properly. Regular maintenance includes cleaning the pump, checking for any debris or blockages, testing the float switch, and ensuring the discharge line is clear. Additionally, the battery backup system, if present, should be tested to ensure it is operational in case of a power outage. Replacement of a sump pump typically depends on its usage and the quality of the pump. On average, a sump pump should be replaced every 7 to 10 years. However, if the pump is frequently used, such as in areas with high water tables or frequent heavy rainfall, it may need to be replaced more often. Signs that a sump pump may need replacement include unusual noises, constant running, failure to start, or visible rust and corrosion. Regular servicing and timely replacement are crucial to prevent basement flooding and water damage. Homeowners should also consider having a professional inspection if they notice any issues or if the pump is nearing the end of its expected lifespan.

What are the signs that a sump pump is failing?

Signs that a sump pump is failing include: 1. **Unusual Noises**: Grinding, rattling, or gurgling sounds may indicate mechanical issues or debris in the pump. 2. **Vibrations**: Excessive vibrations during operation can suggest an imbalanced or damaged impeller. 3. **Infrequent Cycling**: If the pump turns on and off too frequently or not at all, it may be due to a faulty float switch or electrical issues. 4. **Continuous Running**: A pump that runs continuously without shutting off might have a stuck float switch or be unable to handle the water volume. 5. **Visible Rust or Corrosion**: Corrosion on the pump or its components can lead to mechanical failure. 6. **Power Issues**: Frequent tripping of the circuit breaker or power loss can indicate electrical problems. 7. **Water in the Basement**: If water is pooling or flooding, the pump may not be functioning properly. 8. **Old Age**: Pumps older than 7-10 years are more prone to failure and may need replacement. 9. **Stuck Float**: A float that doesn’t move freely can prevent the pump from activating. 10. **Odors**: Foul smells can indicate stagnant water or mold growth due to pump failure. 11. **Visible Damage**: Cracks or damage to the pump housing can affect performance. 12. **Slow Drainage**: If water drains slowly from the sump pit, the pump may be losing efficiency. 13. **Alarm Activation**: Some systems have alarms that sound when the pump isn’t working correctly. 14. **Backflow Issues**: Water returning to the pit can indicate a faulty check valve. Regular maintenance and inspection can help identify these signs early and prevent basement flooding.

How do I install a sump pump in my basement?

1. **Choose Location**: Select the lowest point in your basement where water accumulates. 2. **Prepare the Area**: Clear the area of any obstructions and mark the sump pit location. 3. **Dig the Pit**: Use a jackhammer or concrete saw to cut through the floor. Dig a hole about 2 feet deep and wide enough to fit the sump basin. 4. **Install the Basin**: Place the sump basin in the hole. Ensure the top is level with the floor. Backfill around the basin with gravel to secure it. 5. **Install the Pump**: Place the sump pump inside the basin. Connect the pump to a power source, ensuring it’s on a dedicated circuit. 6. **Install Check Valve**: Attach a check valve to the pump’s discharge pipe to prevent backflow. 7. **Run Discharge Pipe**: Connect PVC piping to the check valve. Run the pipe up and out of the basement, ensuring it directs water away from the foundation. 8. **Seal the Floor**: Use concrete to seal around the basin’s edge, ensuring a flush finish with the floor. 9. **Test the Pump**: Fill the basin with water to ensure the pump activates and discharges water properly. 10. **Secure Power**: Ensure the pump is connected to a GFCI outlet for safety. 11. **Regular Maintenance**: Periodically check the pump for debris and test its operation to ensure reliability.

What is the average lifespan of a sewage pump?

The average lifespan of a sewage pump typically ranges from 5 to 15 years. This variance is influenced by several factors, including the quality of the pump, frequency of use, maintenance practices, and the specific conditions under which the pump operates. High-quality sewage pumps, often made from durable materials like cast iron or stainless steel, tend to last longer than those made from less robust materials. Regular maintenance, such as inspecting and cleaning the pump, checking for clogs, and ensuring that the pump is not running dry, can significantly extend its lifespan. Pumps that are used frequently or are subjected to harsh conditions, such as pumping abrasive or corrosive materials, may experience a shorter lifespan. The installation environment also plays a crucial role. Pumps installed in areas with high levels of debris or sediment may wear out more quickly due to increased mechanical stress. Additionally, the electrical components of the pump, such as the motor and wiring, can affect longevity. Ensuring that the pump is properly wired and protected from electrical surges can prevent premature failure. In summary, while the average lifespan of a sewage pump is generally between 5 to 15 years, achieving the upper end of this range requires selecting a high-quality pump, performing regular maintenance, and ensuring proper installation and operation.

How do I maintain a marine bilge pump?

To maintain a marine bilge pump, follow these steps: 1. **Regular Inspection**: Check the pump and its components regularly for any signs of wear, corrosion, or damage. Ensure the pump is securely mounted and that all connections are tight. 2. **Clean the Strainer**: Remove and clean the strainer frequently to prevent debris from clogging the pump. A clogged strainer can reduce efficiency and cause the pump to overheat. 3. **Test the Pump**: Regularly test the pump by activating it manually or using the float switch to ensure it operates correctly. Listen for unusual noises that might indicate a problem. 4. **Check Electrical Connections**: Inspect all electrical connections for corrosion or looseness. Clean and tighten connections as needed, and apply a corrosion inhibitor to protect them. 5. **Inspect the Float Switch**: Ensure the float switch moves freely and is not obstructed. Test it by lifting it manually to see if it activates the pump. 6. **Examine the Discharge Hose**: Check the discharge hose for kinks, clogs, or damage. Ensure it is properly secured and that the outlet is above the waterline to prevent backflow. 7. **Battery Maintenance**: If the pump is battery-operated, regularly check the battery's charge and condition. Clean the terminals and ensure the battery is securely mounted. 8. **Lubrication**: Some pumps may require lubrication. Refer to the manufacturer’s instructions for guidance on lubrication points and recommended lubricants. 9. **Replace Worn Parts**: Replace any worn or damaged parts immediately to prevent pump failure. Keep spare parts on board for quick repairs. 10. **Record Keeping**: Maintain a log of maintenance activities, including dates and any parts replaced, to track the pump’s condition over time. By following these steps, you can ensure your marine bilge pump remains in good working order, providing reliable service when needed.

What should I do if my sump pump alarm goes off?

1. **Stay Calm**: A sump pump alarm indicates a potential issue, but immediate panic isn't necessary. 2. **Check the Alarm Type**: Determine if it's a water level alarm or a power failure alarm. This will guide your next steps. 3. **Inspect the Water Level**: If it's a high water level alarm, check the sump pit. If water is near the top, the pump may not be working efficiently. 4. **Ensure Power Supply**: Verify that the sump pump is plugged in and the circuit breaker hasn't tripped. Reset the breaker if necessary. 5. **Examine the Pump**: Check for any visible obstructions or debris in the sump pit that might be hindering the pump's operation. 6. **Test the Pump**: Manually lift the float switch to see if the pump activates. If it doesn't, the pump may be faulty. 7. **Check the Discharge Line**: Ensure the discharge line is not frozen or clogged, preventing water from being expelled. 8. **Backup Power**: If there's a power outage, ensure your backup battery or generator is functioning to keep the pump operational. 9. **Inspect the Float Switch**: Ensure the float switch is not stuck or tangled, as this can prevent the pump from activating. 10. **Call a Professional**: If you can't identify or resolve the issue, contact a plumber or sump pump specialist for assistance. 11. **Monitor the Situation**: Keep an eye on the water level and the pump's operation until the issue is resolved. 12. **Regular Maintenance**: Schedule regular maintenance checks to prevent future issues and ensure the pump is in good working condition.

How do I troubleshoot a utility pump that isn't working?

1. **Check Power Supply**: Ensure the pump is plugged in and the outlet is functioning. Test the outlet with another device or use a multimeter. 2. **Inspect the Power Cord**: Look for any visible damage or fraying. Replace the cord if necessary. 3. **Examine the Circuit Breaker**: Check if the circuit breaker has tripped. Reset it if needed. 4. **Test the Float Switch**: Ensure the float switch is not stuck or obstructed. Manually lift it to see if the pump activates. 5. **Inspect the Impeller**: Disconnect power and remove the pump cover to check for debris or blockages in the impeller. Clean if necessary. 6. **Check for Airlocks**: Ensure there are no airlocks in the pump. Bleed the system if required. 7. **Examine the Discharge Hose**: Ensure the hose is not kinked or blocked. Clear any obstructions. 8. **Assess the Pump’s Location**: Ensure the pump is positioned correctly and fully submerged if required. 9. **Listen for Unusual Noises**: Unusual sounds may indicate mechanical issues. Investigate further if necessary. 10. **Check for Overheating**: Allow the pump to cool down if it has overheated. Ensure it is not running dry. 11. **Review the Manual**: Consult the pump’s manual for specific troubleshooting tips related to your model. 12. **Test the Motor**: If accessible, test the motor with a multimeter to ensure it is receiving power. 13. **Inspect Seals and Gaskets**: Check for leaks or damage and replace if necessary. 14. **Contact a Professional**: If the issue persists, consult a professional technician for further diagnosis and repair.

Can a sump pump handle water with debris or solids?
A standard sump pump is primarily designed to handle clear water and is not equipped to manage water containing significant debris or solids. These pumps typically have narrow intake screens and impellers that can become clogged or damaged if large particles or solid materials are present. When debris enters the pump, it can obstruct the flow of water, reduce efficiency, and potentially cause the pump to fail. However, there are specialized sump pumps known as "effluent pumps" or "sewage pumps" that are designed to handle water with solids. These pumps have larger intake openings and more robust impellers capable of processing solids without clogging. They are often used in applications where water may contain sand, gravel, or other debris, such as in certain industrial or agricultural settings. For residential use, if a sump pit is prone to collecting debris, it is advisable to install a sump pump with a built-in grinder or a vortex impeller, which can handle small solids more effectively. Additionally, using a sump pit cover and regularly cleaning the pit can help minimize the amount of debris entering the pump. In summary, while standard sump pumps are not suitable for handling water with debris or solids, there are specific types of pumps designed for such conditions. Selecting the appropriate pump type based on the expected water quality is crucial to ensure efficient operation and prevent damage.