Call +(254) 703 030 000 / 751 483 999 / 721 704 777
Sump & Sewage Pump Floats, Switches & Controls
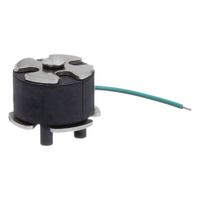
Sump and sewage pump floats, switches, and controls allow pumps to start and stop manually or automatically. Sump and sewage float and diaphragm switches automatically start and stop pumps depending on the water level in the sump basin. Sump and sewage float switch extension and brackets hold multip .....Read More

Frequently Asked Questions
What is the difference between a sump pump float switch and a diaphragm switch?
A sump pump float switch and a diaphragm switch are both mechanisms used to activate sump pumps, but they operate differently.
A **float switch** uses a buoyant object, typically a ball or cylinder, that floats on the water's surface. As the water level rises, the float rises with it. Once the float reaches a certain height, it triggers the switch to activate the pump. There are two main types of float switches: tethered and vertical. Tethered float switches have a cord that allows the float to move up and down, while vertical float switches slide along a rod. Float switches are generally easy to install and are suitable for a variety of sump pump applications.
A **diaphragm switch**, on the other hand, operates based on water pressure. It consists of a flexible membrane or diaphragm that deforms under pressure. As the water level rises, the pressure increases, causing the diaphragm to flex. This movement triggers the switch to activate the pump. Diaphragm switches are typically more compact and are often used in confined spaces where a float switch might not have enough room to operate effectively.
In summary, the main difference lies in their activation mechanisms: float switches rely on buoyancy and movement, while diaphragm switches depend on water pressure and deformation. Each type has its own advantages and is chosen based on the specific requirements of the sump pump system and the installation environment.
How do I adjust the float switch on my sump pump?
To adjust the float switch on your sump pump, follow these steps:
1. **Safety First**: Disconnect the sump pump from the power source to prevent any electrical hazards.
2. **Access the Sump Pit**: Remove the sump pit cover to access the pump and float switch.
3. **Identify the Float Switch Type**: Determine if your float switch is tethered or vertical. Tethered floats are attached to the pump with a cord, while vertical floats slide up and down a rod.
4. **Adjust a Tethered Float**:
- **Length Adjustment**: Shorten or lengthen the tether cord to adjust the float's range of motion. A shorter tether will cause the pump to activate with less water, while a longer tether allows more water to accumulate before activation.
- **Positioning**: Ensure the float can move freely without obstruction. Adjust the tether's attachment point on the pump to avoid tangling or sticking.
5. **Adjust a Vertical Float**:
- **Position on Rod**: Slide the float up or down the rod to change the activation point. Moving it higher will allow more water before activation, while lower will activate the pump sooner.
- **Check for Obstructions**: Ensure the float moves smoothly along the rod without any hindrance.
6. **Test the Adjustment**: Reconnect the power and pour water into the sump pit to test the new float position. Observe the pump's activation and deactivation points to ensure they meet your needs.
7. **Final Adjustments**: If necessary, make further adjustments to the float position and retest until the desired operation is achieved.
8. **Secure and Cover**: Once satisfied, secure the float in place, replace the sump pit cover, and ensure everything is properly reconnected.
9. **Regular Maintenance**: Periodically check the float switch for proper operation and make adjustments as needed.
What are the signs of a failing sump pump float switch?
Signs of a failing sump pump float switch include:
1. **Inconsistent Operation**: The pump may turn on and off erratically, indicating the float switch is not functioning properly.
2. **Pump Runs Continuously**: If the pump runs without stopping, the float switch might be stuck in the "on" position or is unable to drop back down.
3. **Pump Fails to Activate**: The pump does not turn on when the water level rises, suggesting the float switch is stuck or broken.
4. **Physical Obstructions**: Debris or dirt can obstruct the float switch, preventing it from moving freely.
5. **Float Switch Stuck**: The float may get caught on the side of the sump pit or tangled with the pump's power cord, hindering its movement.
6. **Unusual Noises**: Grinding or humming noises can indicate the float switch is not engaging or disengaging the pump correctly.
7. **Water Level Remains High**: If the water level in the sump pit remains high despite the pump being operational, the float switch might not be triggering the pump to start.
8. **Visible Damage**: Cracks, corrosion, or other visible damage to the float switch can impair its function.
9. **Age and Wear**: Over time, wear and tear can cause the float switch to fail, especially if it’s an older model.
10. **Manual Testing Failure**: When manually lifting the float, if the pump does not activate, the switch may be faulty.
Regular maintenance and inspection can help identify these issues early, preventing potential basement flooding.
How do I install a sump pump float switch?
1. **Turn Off Power**: Ensure the sump pump is unplugged or the circuit breaker is turned off to prevent electrical shock.
2. **Remove the Pump**: Disconnect the sump pump from the discharge pipe and remove it from the sump pit.
3. **Select the Float Switch Type**: Choose between a tethered float switch or a vertical float switch based on your sump pit size and pump type.
4. **Attach the Float Switch**:
- **Tethered Float Switch**: Secure the float switch to the pump or discharge pipe using a hose clamp or zip tie. Ensure the tether length allows the float to move freely without obstruction.
- **Vertical Float Switch**: Attach the switch to the pump or a separate rod. Ensure it can move up and down without interference.
5. **Position the Float**: Adjust the float switch so it activates the pump at the desired water level. The pump should turn on before the water reaches the top of the sump pit and turn off when the water is sufficiently low.
6. **Test the Switch**: Manually lift the float to ensure the pump activates and deactivates correctly. Adjust the float position if necessary.
7. **Reinstall the Pump**: Place the pump back into the sump pit and reconnect the discharge pipe.
8. **Secure the Power**: Plug the pump back in or turn on the circuit breaker.
9. **Final Test**: Pour water into the sump pit to ensure the float switch activates the pump at the correct water level and turns off appropriately.
10. **Adjustments**: Make any necessary adjustments to the float switch position to ensure optimal operation.
Can I use a float switch with any sump pump?
Yes, you can use a float switch with most sump pumps, but compatibility depends on several factors. A float switch is a device that detects the water level in a sump pit and activates the sump pump when the water reaches a certain height. Here are some considerations:
1. **Type of Sump Pump**: Most submersible and pedestal sump pumps can be used with a float switch. However, some pumps come with built-in float switches, and adding an external one might not be necessary or possible without modifications.
2. **Switch Type**: There are different types of float switches, such as tethered, vertical, and electronic. Tethered switches require more space to operate, while vertical switches are suitable for smaller pits. Ensure the switch type is compatible with your sump pump and pit size.
3. **Voltage and Amperage**: The float switch must be compatible with the pump's electrical specifications. Check the voltage and amperage ratings to ensure they match the pump's requirements.
4. **Installation**: Proper installation is crucial for the float switch to function correctly. Follow the manufacturer's instructions for installation, and ensure the switch has enough room to move freely without obstructions.
5. **Pump Modifications**: If your sump pump has a built-in switch that is malfunctioning, you might need to disable it before adding an external float switch. This may require technical expertise.
6. **Warranty and Support**: Adding an external float switch might void the pump's warranty. Check with the manufacturer for compatibility and warranty implications.
In summary, while you can use a float switch with most sump pumps, ensure compatibility with the pump type, electrical specifications, and installation requirements.
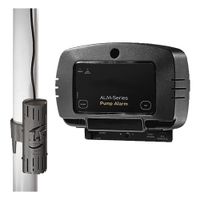
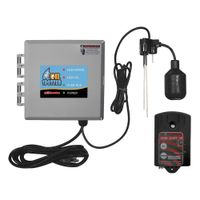
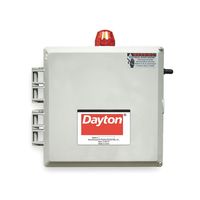
How do I troubleshoot a sump pump control panel?
1. **Safety First**: Disconnect power to the control panel to prevent electrical shock.
2. **Visual Inspection**: Check for obvious signs of damage, such as burnt components, loose wires, or water ingress.
3. **Power Supply**: Ensure the control panel is receiving power. Use a multimeter to check voltage at the input terminals.
4. **Fuses and Breakers**: Inspect fuses and circuit breakers for continuity. Replace any blown fuses or reset tripped breakers.
5. **Float Switches**: Verify that float switches are functioning properly. Manually lift the float to see if it activates the pump.
6. **Relay and Contacts**: Check the relay and contactor for wear or damage. Listen for clicking sounds when the pump is supposed to activate.
7. **Wiring Connections**: Tighten any loose connections and ensure all wires are properly connected according to the wiring diagram.
8. **Pump Operation**: Test the pump by manually activating it from the control panel. Listen for unusual noises or vibrations.
9. **Alarm System**: If equipped, test the alarm system to ensure it activates under fault conditions.
10. **Component Testing**: Use a multimeter to test individual components like capacitors, resistors, and diodes for proper function.
11. **Control Settings**: Verify that all settings on the control panel are correct and have not been altered.
12. **Moisture and Corrosion**: Check for moisture or corrosion inside the panel, which can cause malfunctions.
13. **Documentation**: Refer to the manufacturer’s manual for specific troubleshooting steps and component specifications.
14. **Professional Help**: If issues persist, consult a professional electrician or technician for further diagnosis and repair.
What is the best type of float switch for a sewage pump?
The best type of float switch for a sewage pump is a tethered float switch. Tethered float switches are ideal for sewage applications due to their durability and ability to handle the harsh conditions typically found in sewage systems. These switches are designed to operate in environments with high levels of debris and solids, which are common in sewage systems.
Tethered float switches consist of a float attached to a flexible cable, allowing the float to move freely with the liquid level. This design minimizes the risk of the float getting stuck or obstructed by debris, ensuring reliable operation. The tethered design also allows for a wider range of motion, which can be beneficial in applications where the liquid level fluctuates significantly.
Additionally, tethered float switches are generally more robust and can handle the corrosive nature of sewage, thanks to their construction from durable materials like polypropylene or PVC. They are also less likely to be affected by turbulence in the tank, which can be a common issue in sewage systems.
While other types of float switches, such as vertical or electronic float switches, may be used in sewage applications, tethered float switches are often preferred due to their simplicity, reliability, and cost-effectiveness. They require minimal maintenance and are easy to install, making them a practical choice for both residential and commercial sewage pump systems.